
Users
Only users with Administration Grant (for any Scope) are permitted to view, create, edit and disable ‘Users’.
This article is aimed at Admin users for Accounts and Fleets. Users with a Scope of Service Provider will need to refer to this article.
Search and Filter
![]() Administrative users can view the User directory by using the Navigation bar, or clicking on the ellipses
Administrative users can view the User directory by using the Navigation bar, or clicking on the ellipses ![]() on the Scope banner.
on the Scope banner.
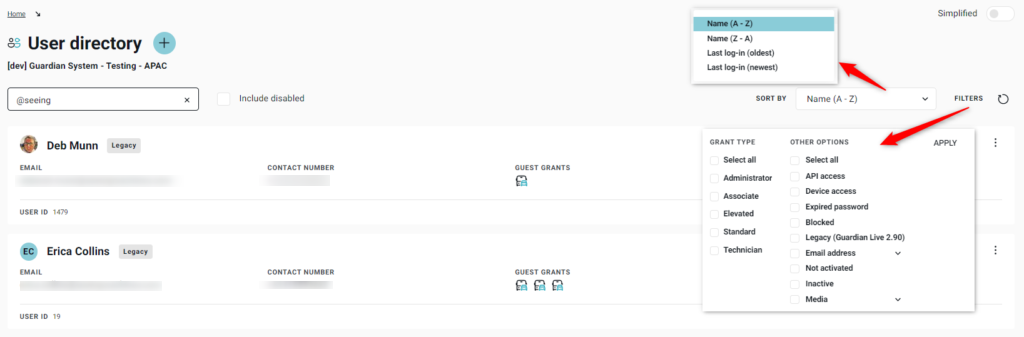
- Search. Users can search using part of the user’s name (or part of it), or their email address (or part of it e.g. @seeingmachines.com)
- Include Disabled. Users can refine the search to include Disabled users.
- Sort By. Users can sort by Name (A-Z) or last log-in (oldest or newest).
- Filter. Users can filter results to focus on those users they want to see. Users must click ‘Apply’ to ensure these filter options are set.
- Refresh. Allows users to refresh their view based on the sorting/filters they have selected.
Create New User
To create a New User, the user will need to Go to the People page and click on the ‘plus’ button.
The ‘Add User’ form is a multi-step form, where different fields will be visible depending on the selections you make. Mandatory fields are marked with a red asterisk ![]() . Users will not be able to progress to the next step if a mandatory field has not been completed.
. Users will not be able to progress to the next step if a mandatory field has not been completed.
The following describes the different steps:
| Step | Description |
|---|---|
| Details | 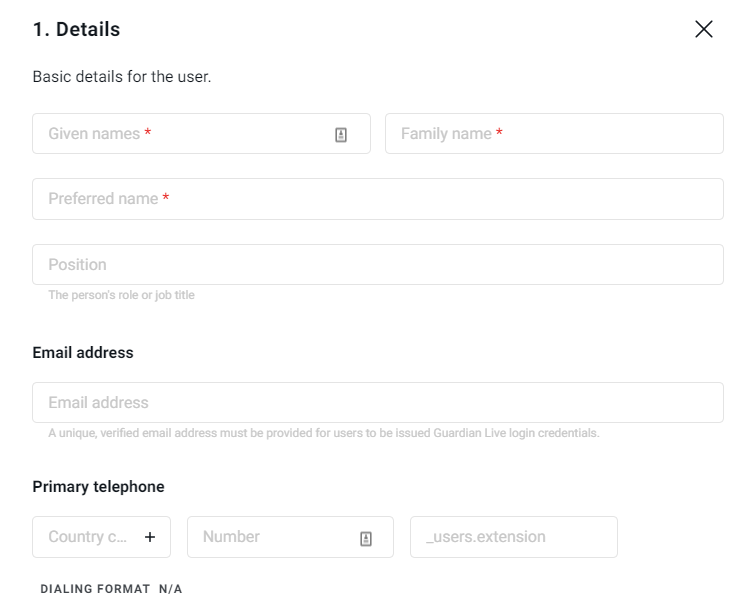
|
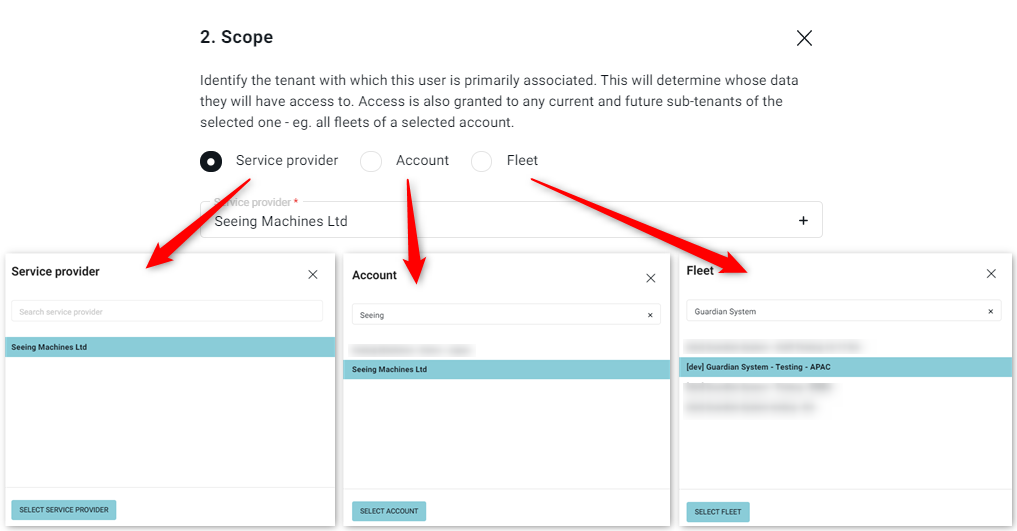
| Scope (Who does the user belong to?) |
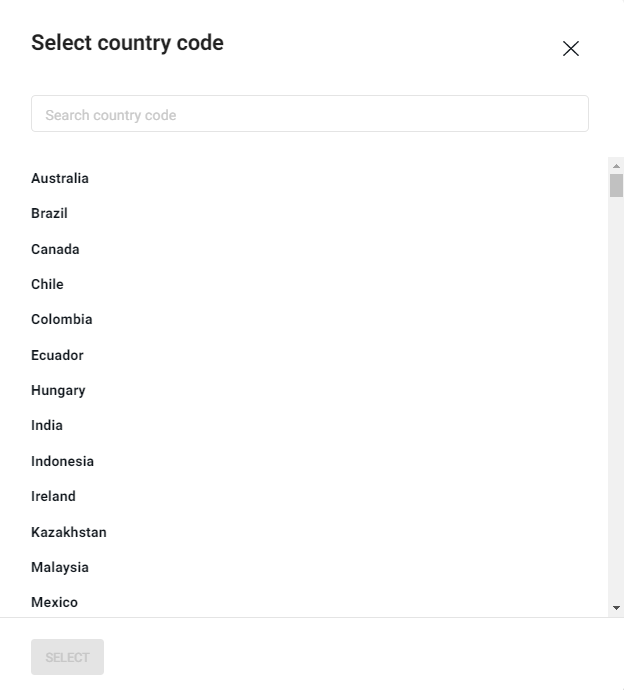
Note – Admin users will only be able to select a new user’s Scope that is equal to or less than their own Scope. Note – The Service provider, Account or Fleet can be found using the search bar. All or part of the name can be used to search. Note – If a user only needs to have access to a single fleet then Fleet can be selected. Guest Grants can be used if a user needs access to more than one fleet but not the entire account. |
| Basic Grant (What can the user see and do?) | 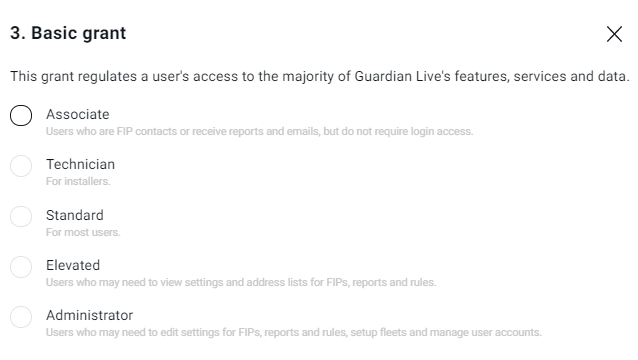
Note – Admin users will only be able to select a new user’s basic Grant that is equal to or less than their own Grant. |
Guardian Events includes:
|
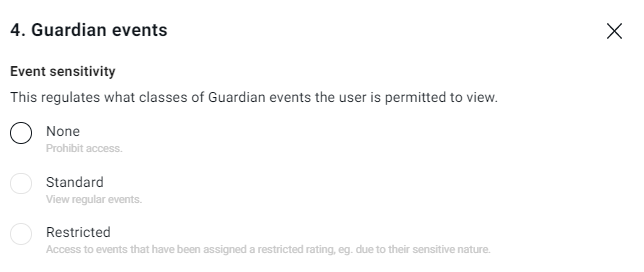
Note – Care should be taken when allowing users to view Restricted events (as the content may be disturbing or offensive).
Note – Only Guardian Centre Analysts (from a Service Provider) will be able to Classify Events. Users should not be provided with this level of access (if they are, they will not be able to complete any action for events). Acknowledge events allows users to remove events from their Dashboard view and to change Fatigue Risk. Most user should be given ‘View-only’ access.
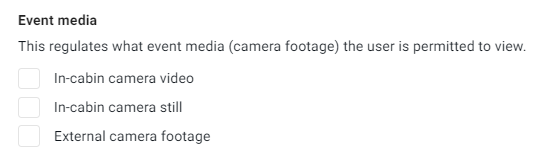
Note – consideration needs to be given to the privacy of drivers and IF users need to see video or still images of the driver. External camera footage refers to the Foward Facing Camera. |
| Special Grants | 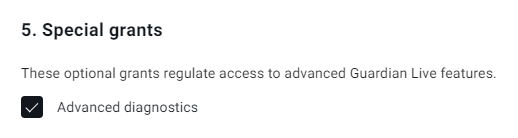
Note – Special Grants allow a user with a Scope of Service Provider to access additional information about their systems. Typically it will be left blank. |
| Guardian Device Access | 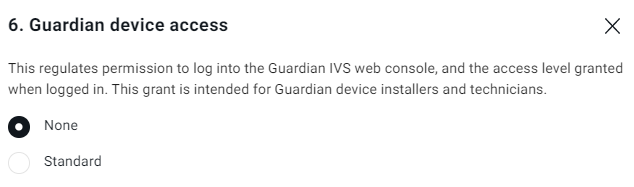
Note – Device Access is typically given to Installation Certified Technicians. Standard access allows users to log in to the Guardian In-Vehicle System (IVS) console provided they have an active Technical Communication Portal (TCP) user account that has been approved (typically Installation Certified Technician, Trainers, and Tier 1 Support Agents). |
| Localisation Settings | 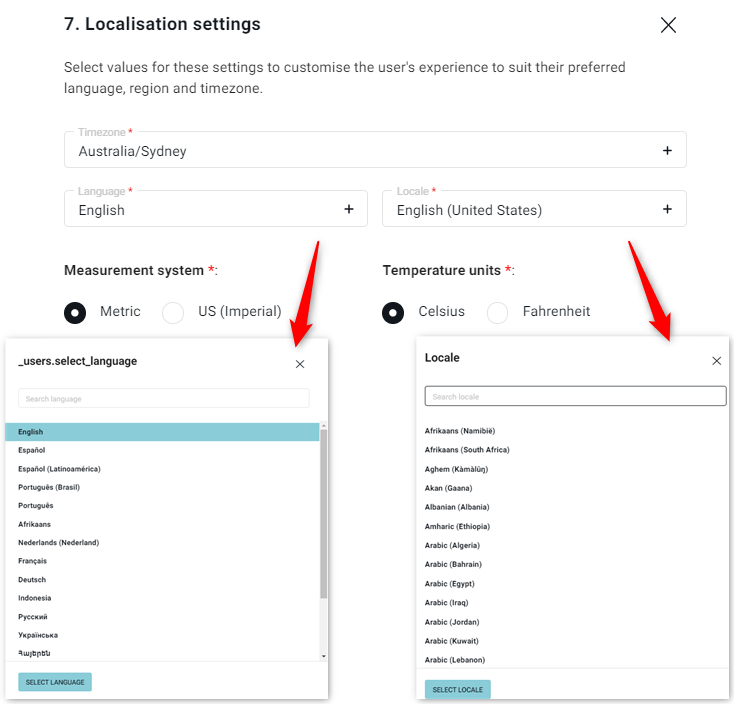
Note – Not all languages are available in Guardian Live; however, this article may assist users to translate English to their preferred language. Note – Users can change their local settings. |
| Credentials |
|
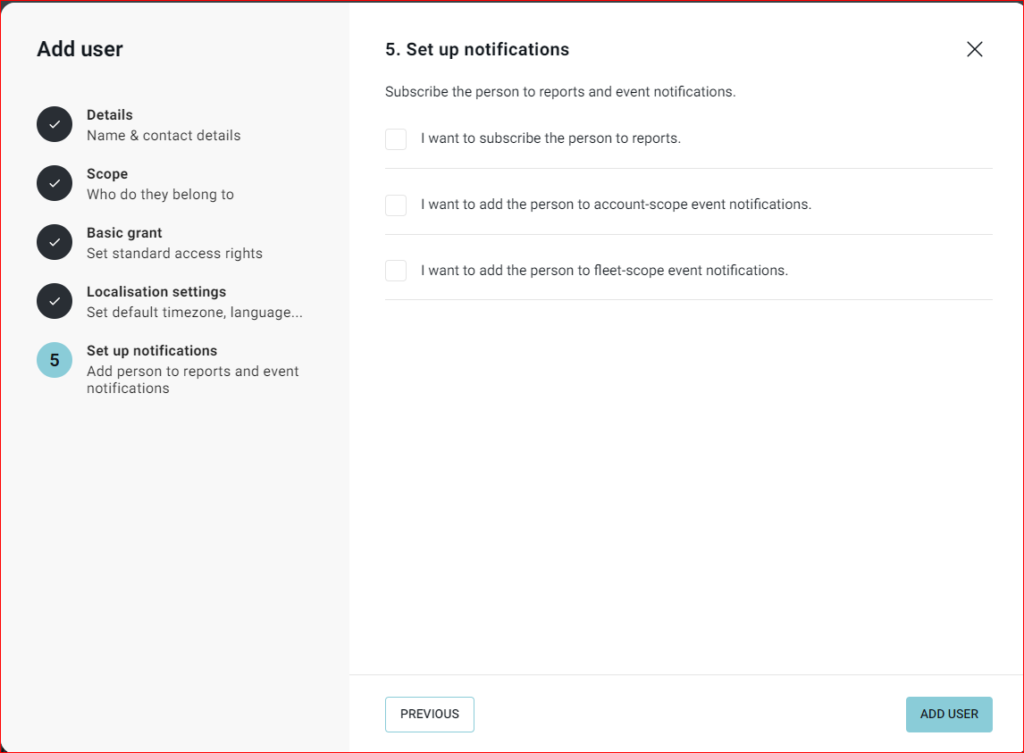
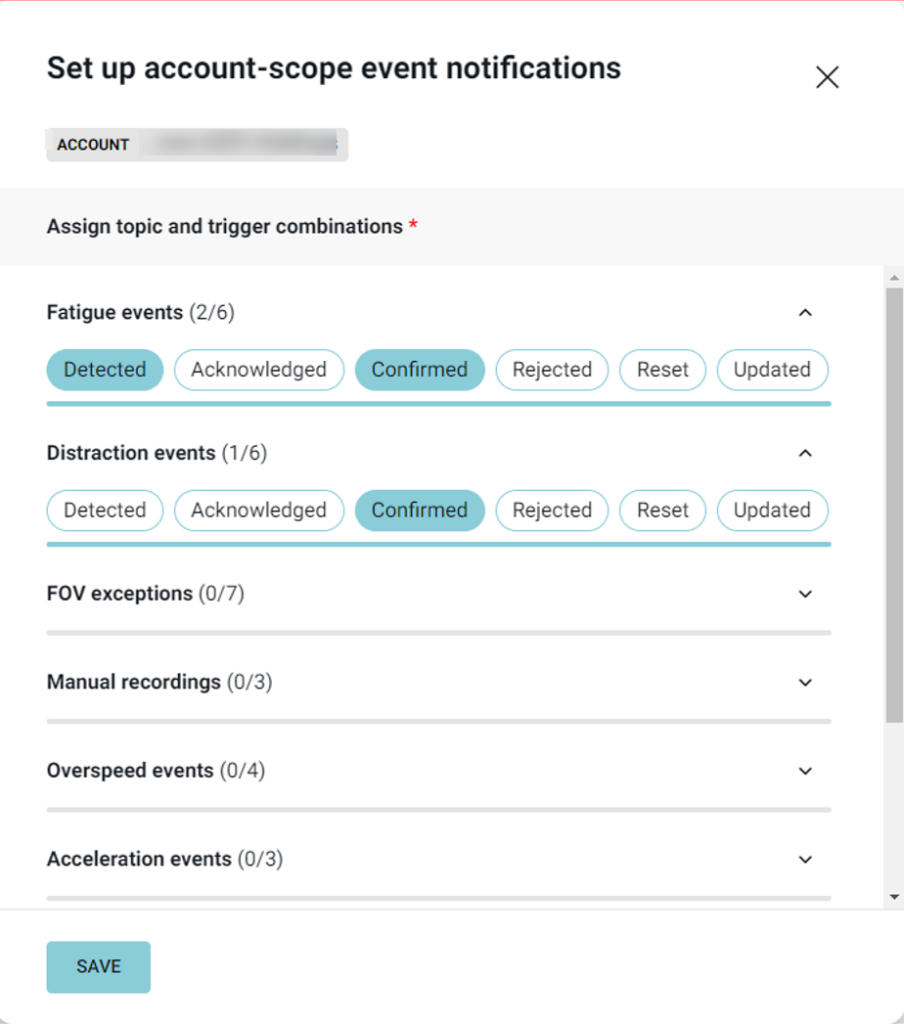
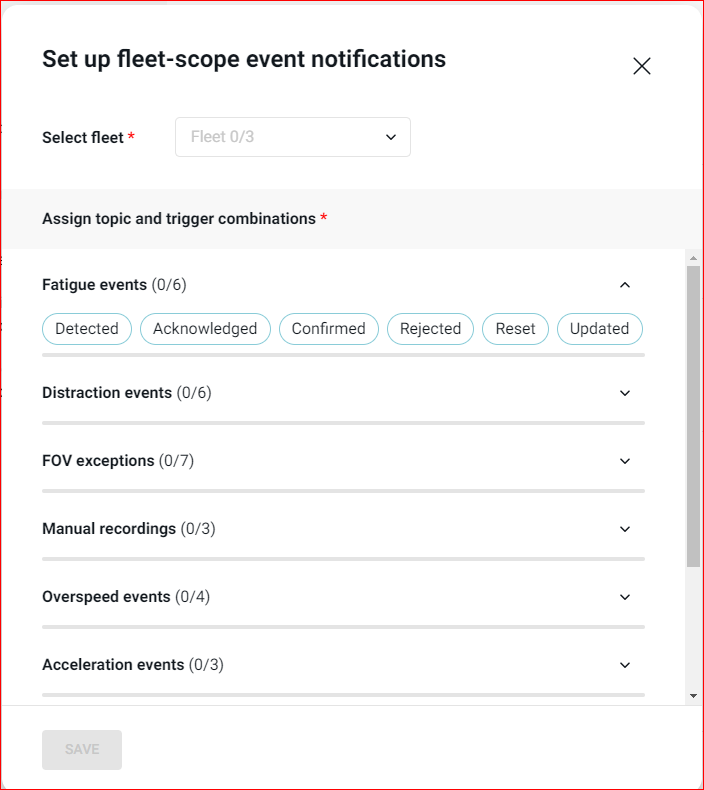
| Set up notifications | If the user is being added to an account or a fleet scope, the step to Set up notifications appears where the newly added user can be subscribed to reports, account, and fleet scope notifications in the same onboarding flow.
|

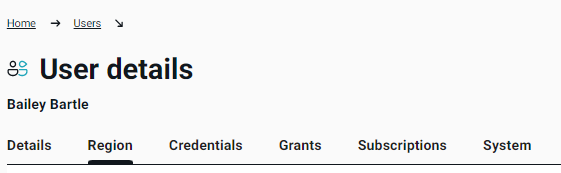
Edit a User
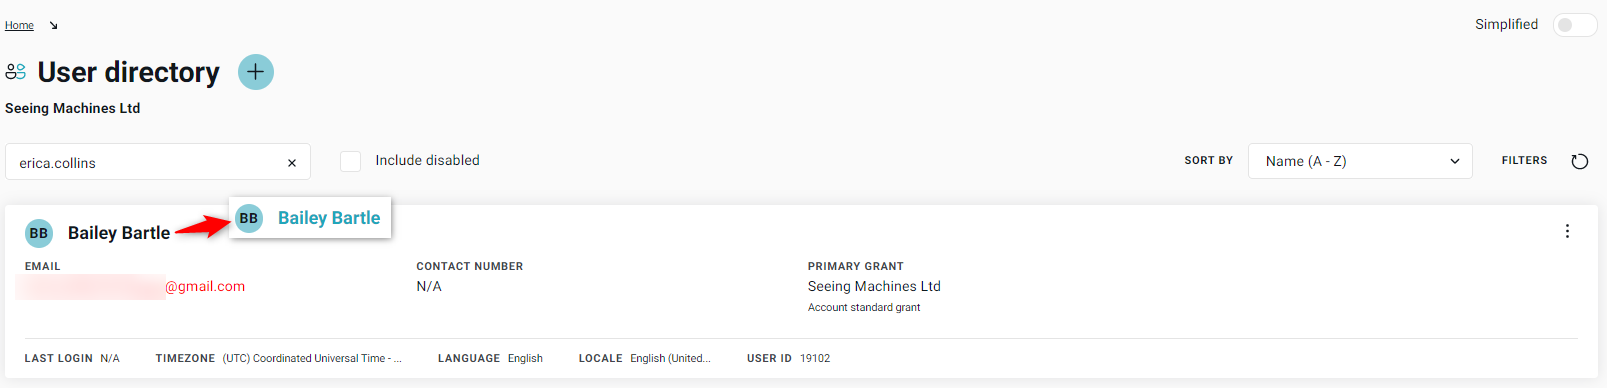
After using the search and filter functions to find the user to edit, click on their name (it will change color when the mouse hovers over the name). The User details will appear. Note – Users can only edit other users that have the same or less Scope.
The following describes the different options available to be edited:
| Step | Description |
|---|---|
| Details | 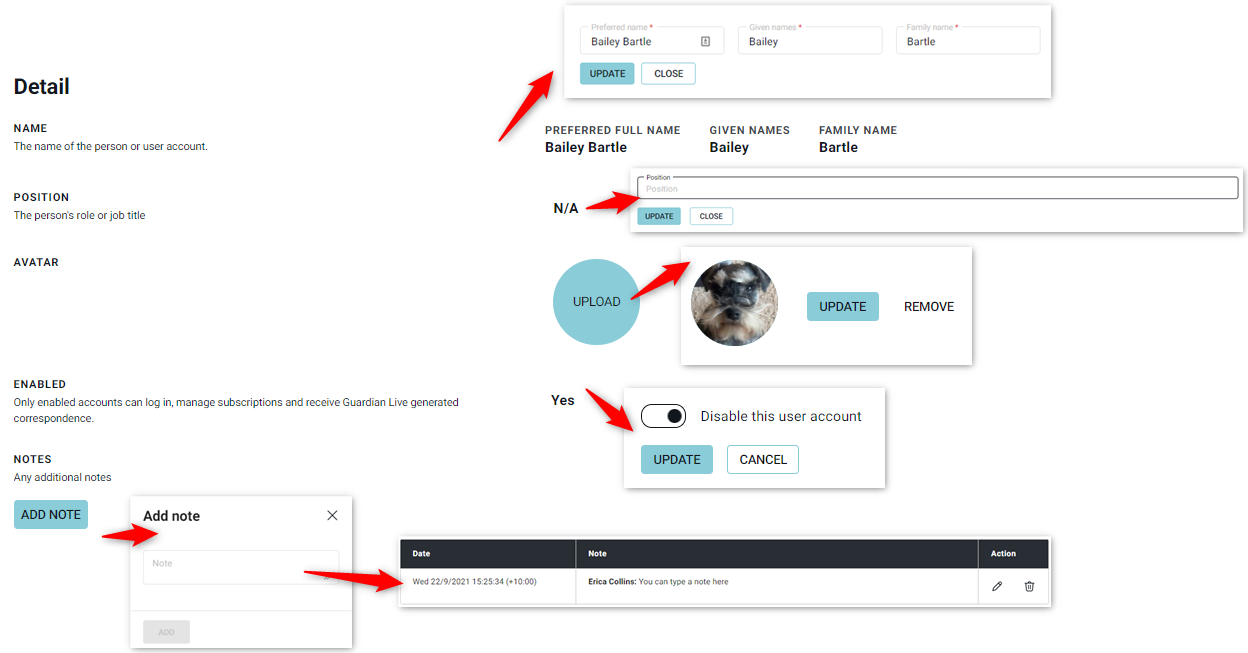
Note – Admin users can change any detail that is in bold text. Note – Disabling a user account will prevent them from logging in and accessing Guardian Live. When adding a note, the date, time, and details of who made the note are visible on this page.
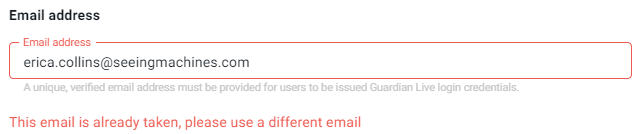
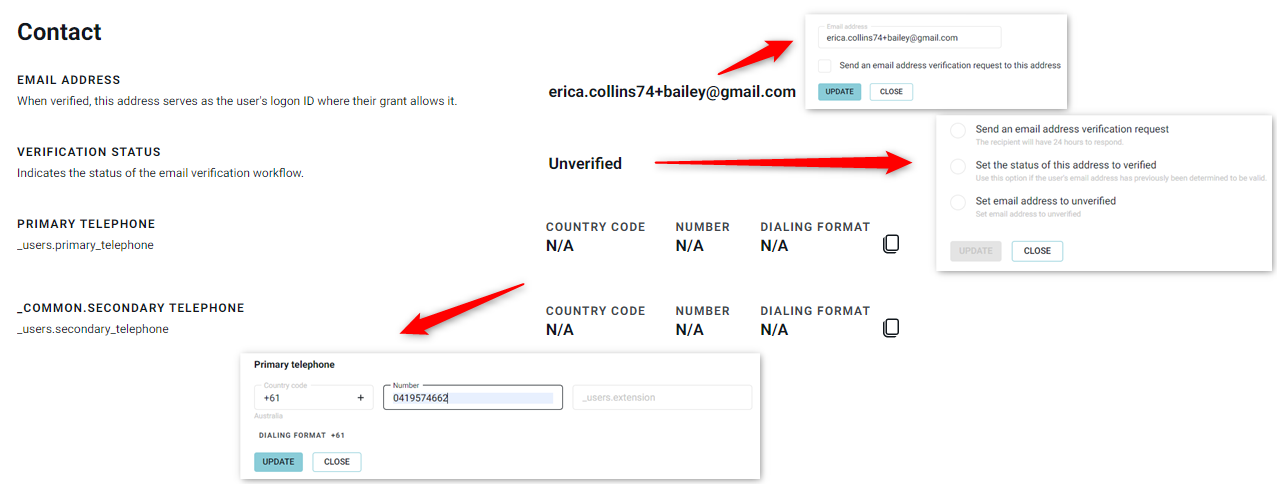
Note – Admin users can update a user’s email. When this is done it is highly recommended that a verification email is sent to the address. Note – If a user’s email has not been verified (by the user) then the Admin user can send another verification email. It is highly recommended that Admin users only select the status to ‘verified’ when they are absolutely certain that the email is valid. |
| Region | 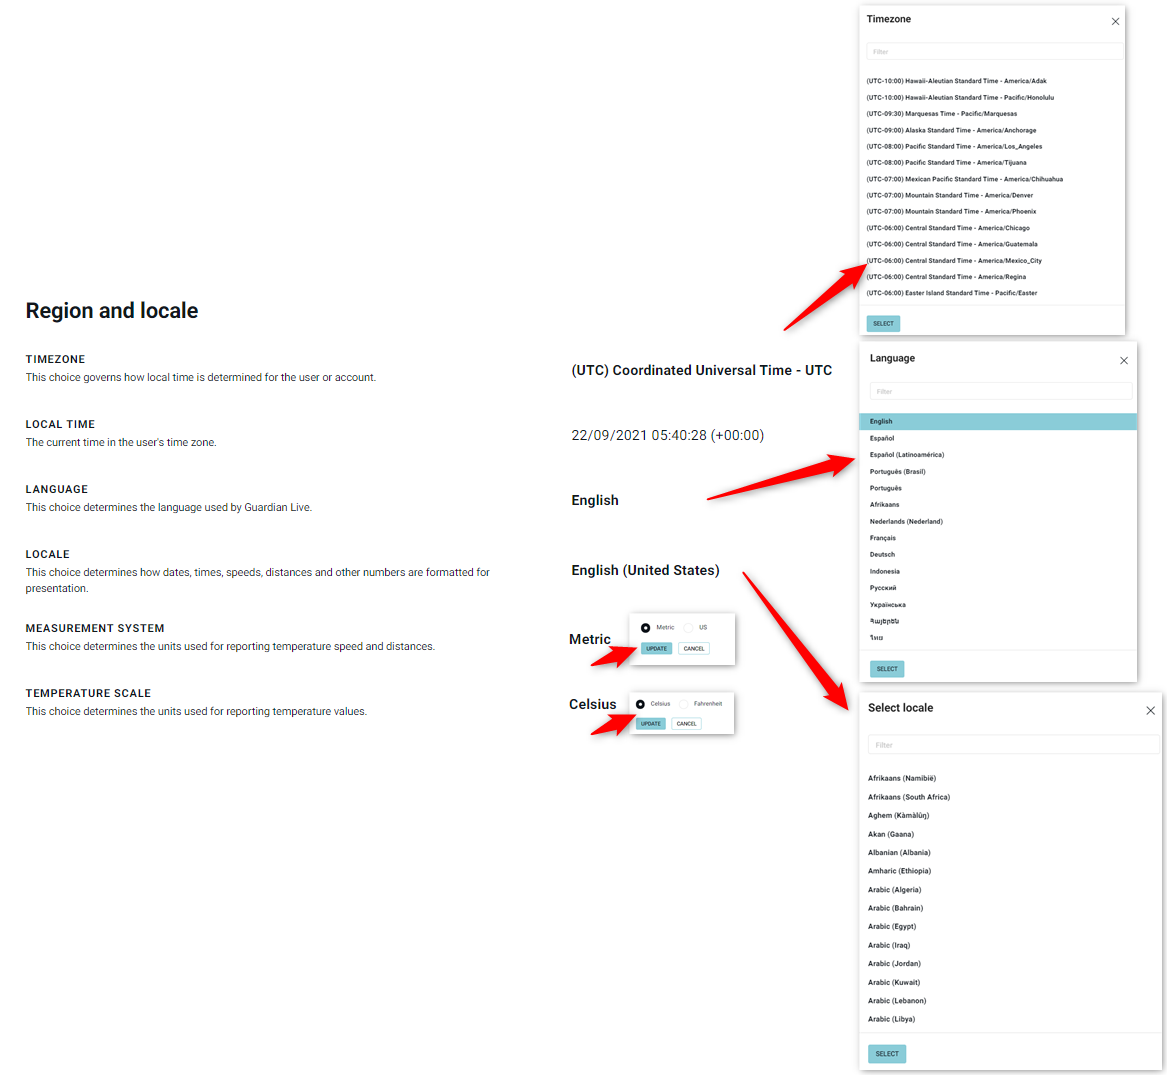 |
| Credentials |
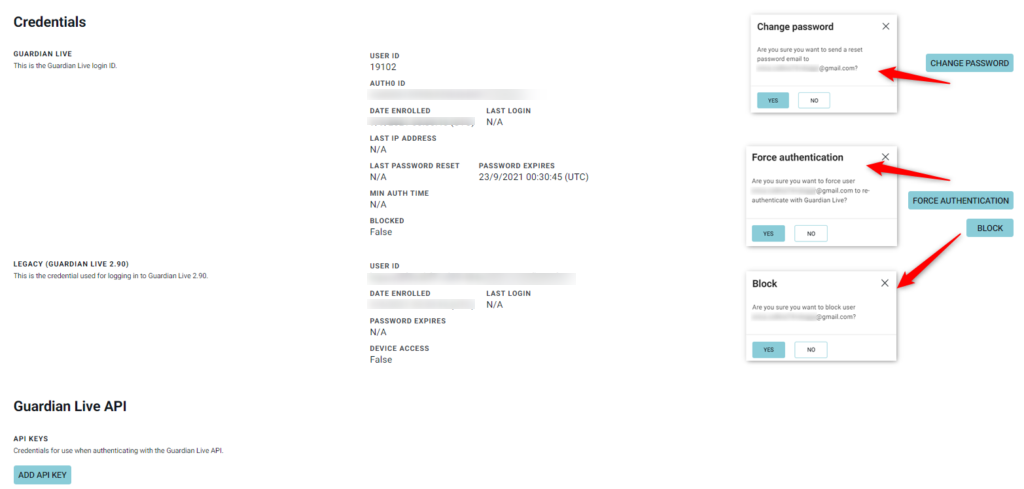
Admin Users can force the user to change their password or to reauthenticate their email. Note – When a user is ‘Blocked’ they will be unable to log on to Guardian Live. They will be required to contact an Administrator to unblock their account. It is recommended that ‘Notes’ are used to record why a user was blocked. Note – the ‘Add API Key’ is only authorized for Host users. |
| Grants | 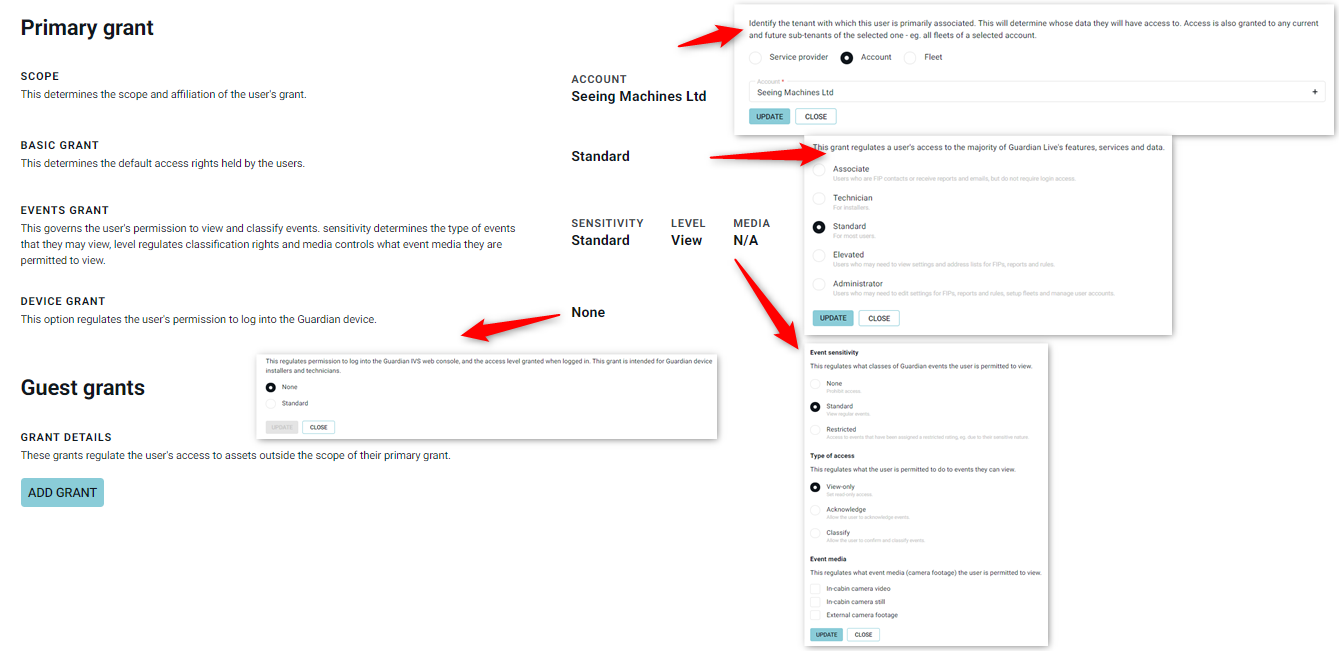
Note – An Admin User can only adjust Grants equal to or less than their own. Guest Grants are discussed later in this article. |
| Subscriptions | 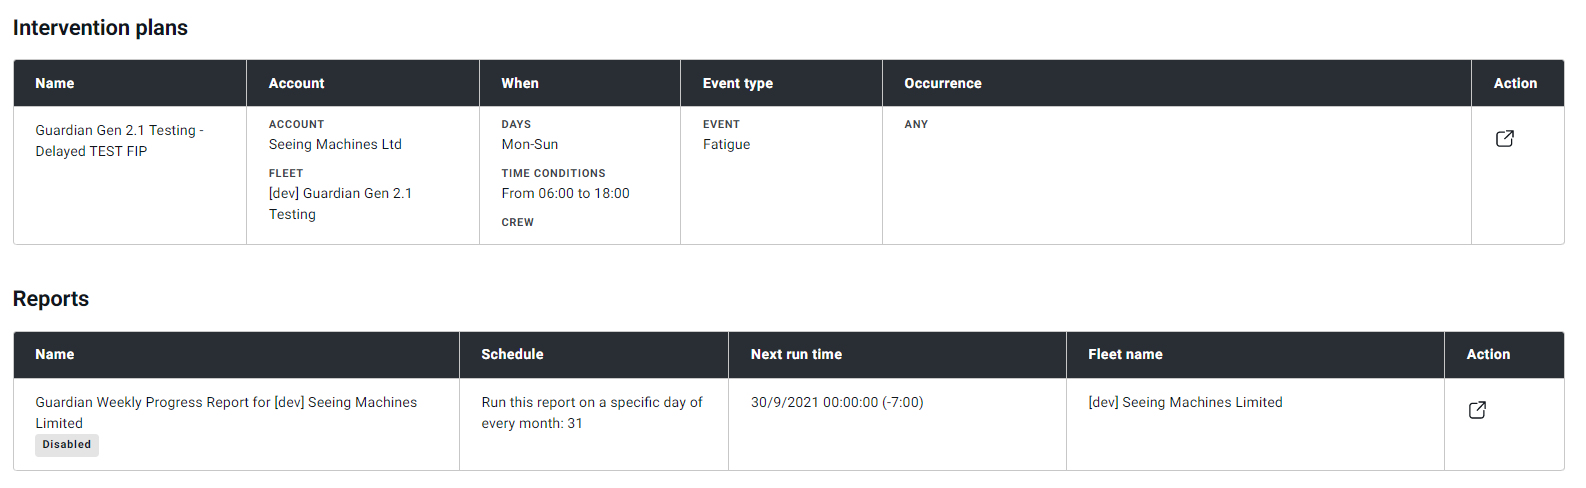
Note – Clicking on the |
| System | 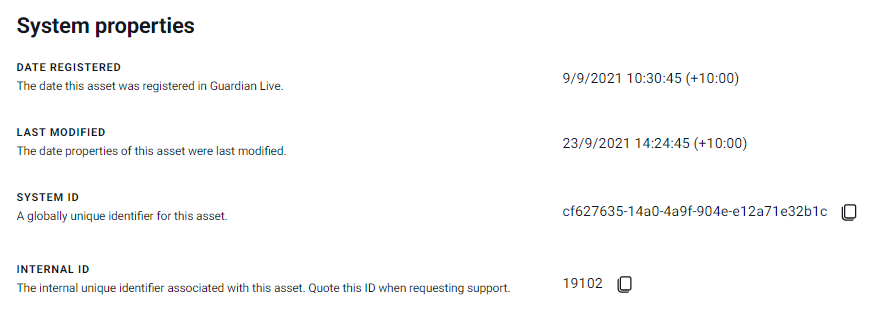
Clicking on the |
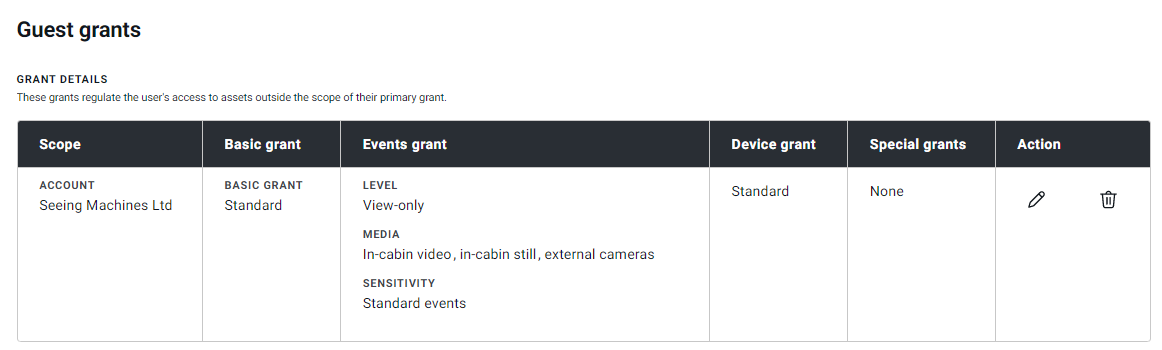
Add and Edit Guest Grants
Where a user needs access to more than one fleet or more than one account, a Guest Grant can be created. Adding a Guest Grant is very similar to creating a New User where the user will be provided with a multi-step form to complete. Admin users need to navigate to the ‘Grants’ tab in the User details view.
Note – Admin users will only be able to provide a Grant that is equal to or less than their own.

Most of the options that were available when creating a new user are available in this multi-step process. The only information that is not required is the personal details, localization settings, and confirmation credentials. Similar to the previous step to set up notifications for the user, we can set up the notifications for accounts, fleet, or reports from this add grants flow as well.
When a Guest Grant has been created, the user’s profile will show the details of the grant. From here the Guest Grant can be edited ![]() or deleted
or deleted ![]() .
.
The users ’tile’ will also be updated to show that they have Guest Grants added. Hovering over the icon ![]() (Account) or
(Account) or ![]() (Fleet) will provide the name of the Account or Fleet. Clicking on that icon will take the Admin user to the Grants tab.
(Fleet) will provide the name of the Account or Fleet. Clicking on that icon will take the Admin user to the Grants tab.

Note: Only a Host Administrator can provide grants for users who need to access Fleets administered by different Service Providers. Care should be taken when providing Guest Grants across Service Providers as there is a high risk of a data breach.
Enable/Disable a User
If a user has not logged in for 90 days, Guardian Live will require the user to reset their password.
After 180 days of no activity, the account will be considered ‘stale’ and blocked. When they attempt to log in, they will be asked to contact their Administrator.
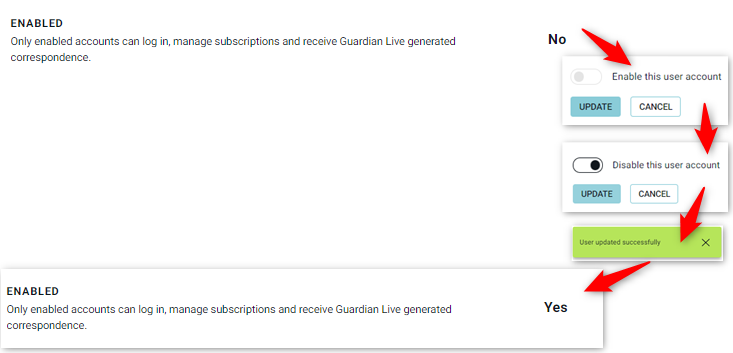
Admin users can also disable a user if needed. However, Admin users can only do this for users that have the same Scope or lower than them. The step above can be used to disable a user.
