
Introduction
Guardian Live has been designed to be intuitive and simple to use. The overall functionality will be the same for all users; however, the information visible and the ability to manipulate information will differ depending on the Users Scope and Grants.
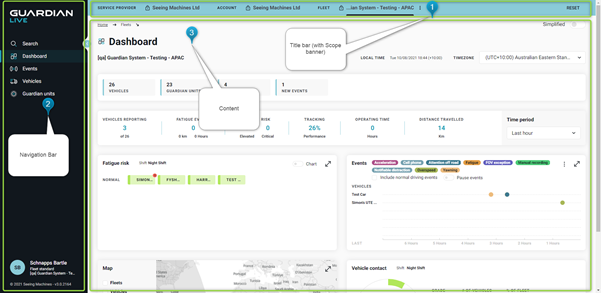
There are 3 components to the site that will remain constant regardless of the type of information you are viewing.
- Title Bar (with Scope Banner)
- Navigation Bar
- Content
Title Bar/Scope Banner
To understand this section, it is important that you understand the concept of Scope and Grants as outlined in this article.
The Title Bar (also known as the Scope Banner) helps you understand your Scope and helps you to understand the information that you are viewing in the content section.
The ‘padlock’ ![]() icon helps you to understand what rights you have. If there is no padlock visible, then you are able to view more information within your Scope.
icon helps you to understand what rights you have. If there is no padlock visible, then you are able to view more information within your Scope.

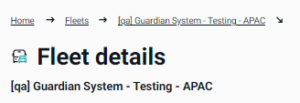
In the Scope Banner above, the user can only access one Fleet – the Guardian System – Testing – APAC Fleet. You can tell that because there is a padlock on ‘Service Provider’, ‘Account’ and ‘Fleet’. This user has ‘Fleet’ access only.
If the user wishes to access additional Fleets, but they do not have an Account Scope, they will have to go to their ‘Guest Grants‘ available by viewing their profile.
A vertical ellipsis ![]() will open up a menu for ‘views’ available within that Scope (see image above). Where an ‘X’ is visible, that will clear the selection.
will open up a menu for ‘views’ available within that Scope (see image above). Where an ‘X’ is visible, that will clear the selection.
When the name of a Account or Service Provider has a bold underline, that indicates the Scope for the information displayed on the screen. ![]() Note this in the images below.
Note this in the images below.
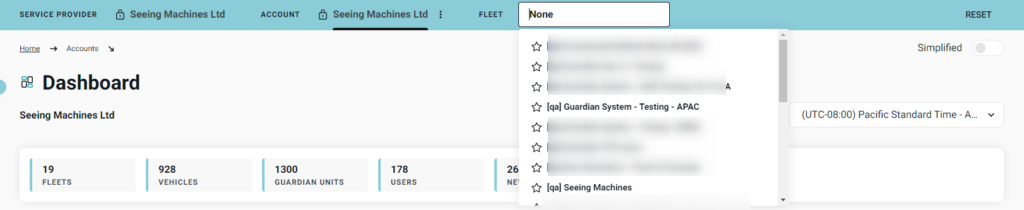
In this Scope Banner, the user is able to search for all the Fleets within the Seeing Machines Ltd Account. This user has ‘Account’ access.
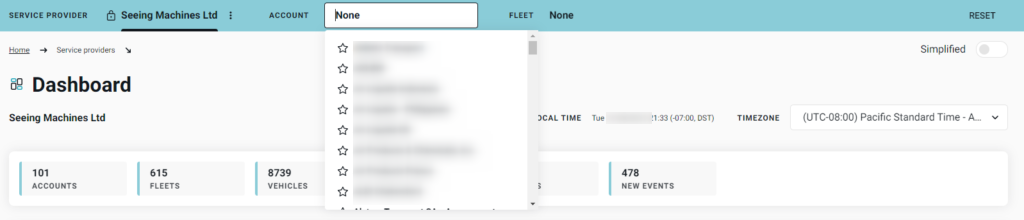
In this Scope Banner, the user is able to search or all the Accounts and all the Fleets within the Seeing Machines Ltd ‘Service Provider’. This user has ‘Service Provider’ access.
Navigation Bar
At the top of the Navigation Bar is the ‘Global Search’ function. Users can search for all, or some (using filters). The search results are able to be clicked to take the user to the information they are looking for.
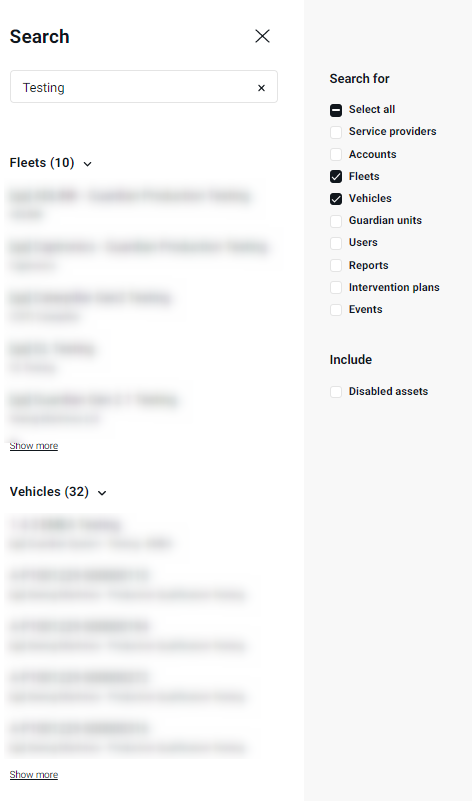
The Navigation Bar also provides quick access to the information that you are permitted to view within your Scope and Grant.
As a refresher:
- Standard Users. These are users that only need to view information within their Scope. Suitable for most users.
- Elevated Users. These users have permission to view ‘sensitive information in particular FIP Contacts and Report details.
- Admin Users. These users have permission to manage information within their Scope. This includes creating and editing users.
The following shows you how the views will differ depending on the user’s Scope and Grant.
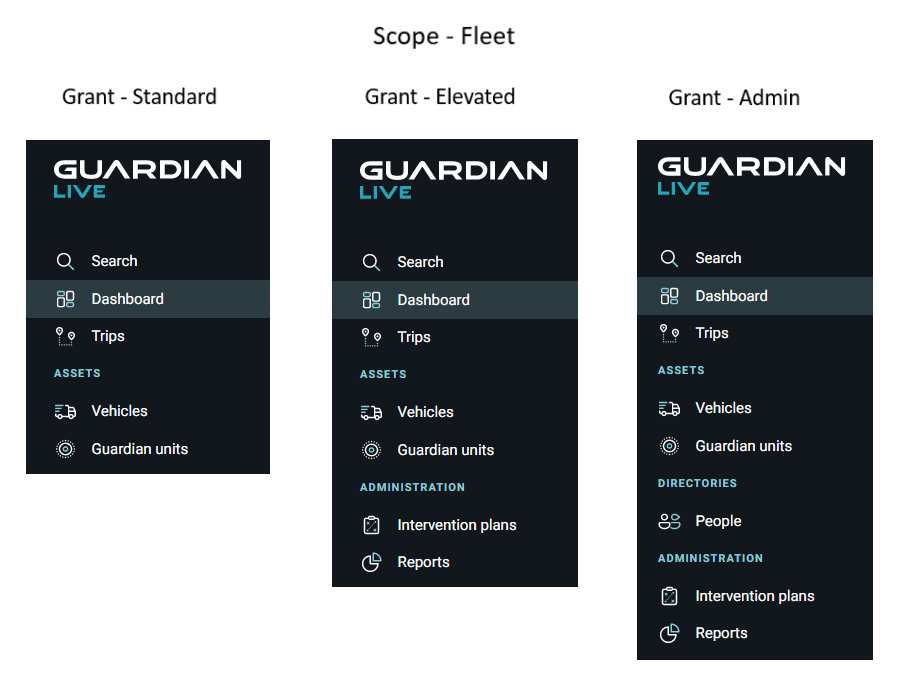
The image above shows the navigation options available to users with the Fleet Scope but with different Grants. You can see that Elevated and Admin users have an ‘Administration’ section.
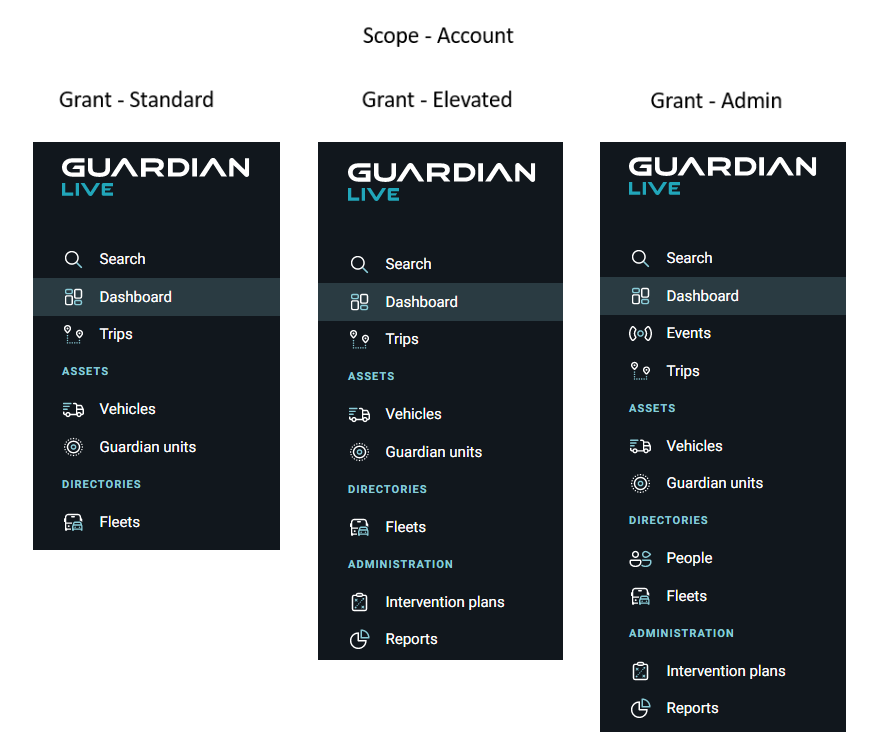
The image above shows the navigation options available to users with the Account Scope but with different Grants. In the Account Scope ‘Vehicles’ and ‘Guardian Units’ are now grouped under a heading called ‘Assets’. Users with this Scope can now view all the Fleets within their Account.
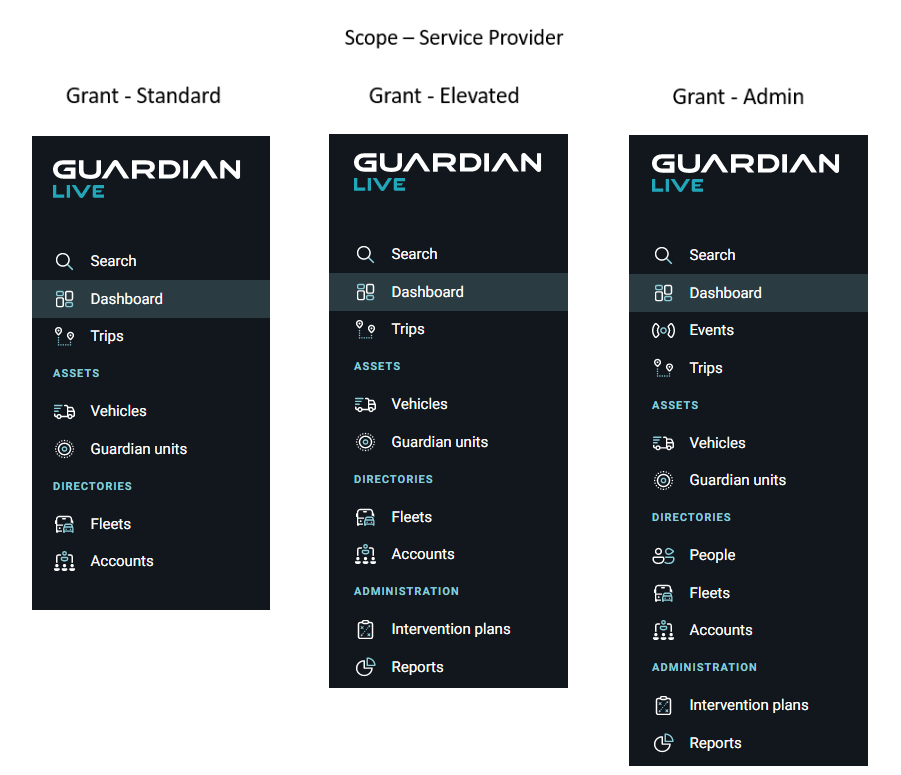
The Service Provider Scope provides the ability to view ‘Account’ information under ‘Assets’.
Users may also navigate to these menu items by clicking on the ellipsis ![]() next to the Service Provider or Account scope level.
next to the Service Provider or Account scope level.

Content
As outlined above, there are multiple views available to users depending on their Scope and Grant. What users will see in each view is described in detail in this Content View article.
Hide the Navigation Bar
Users can expand the amount of data visible on the content page by minimizing the Navigation Bar. When minimized, hovering the cursor over the icon will describe what the icon represents.

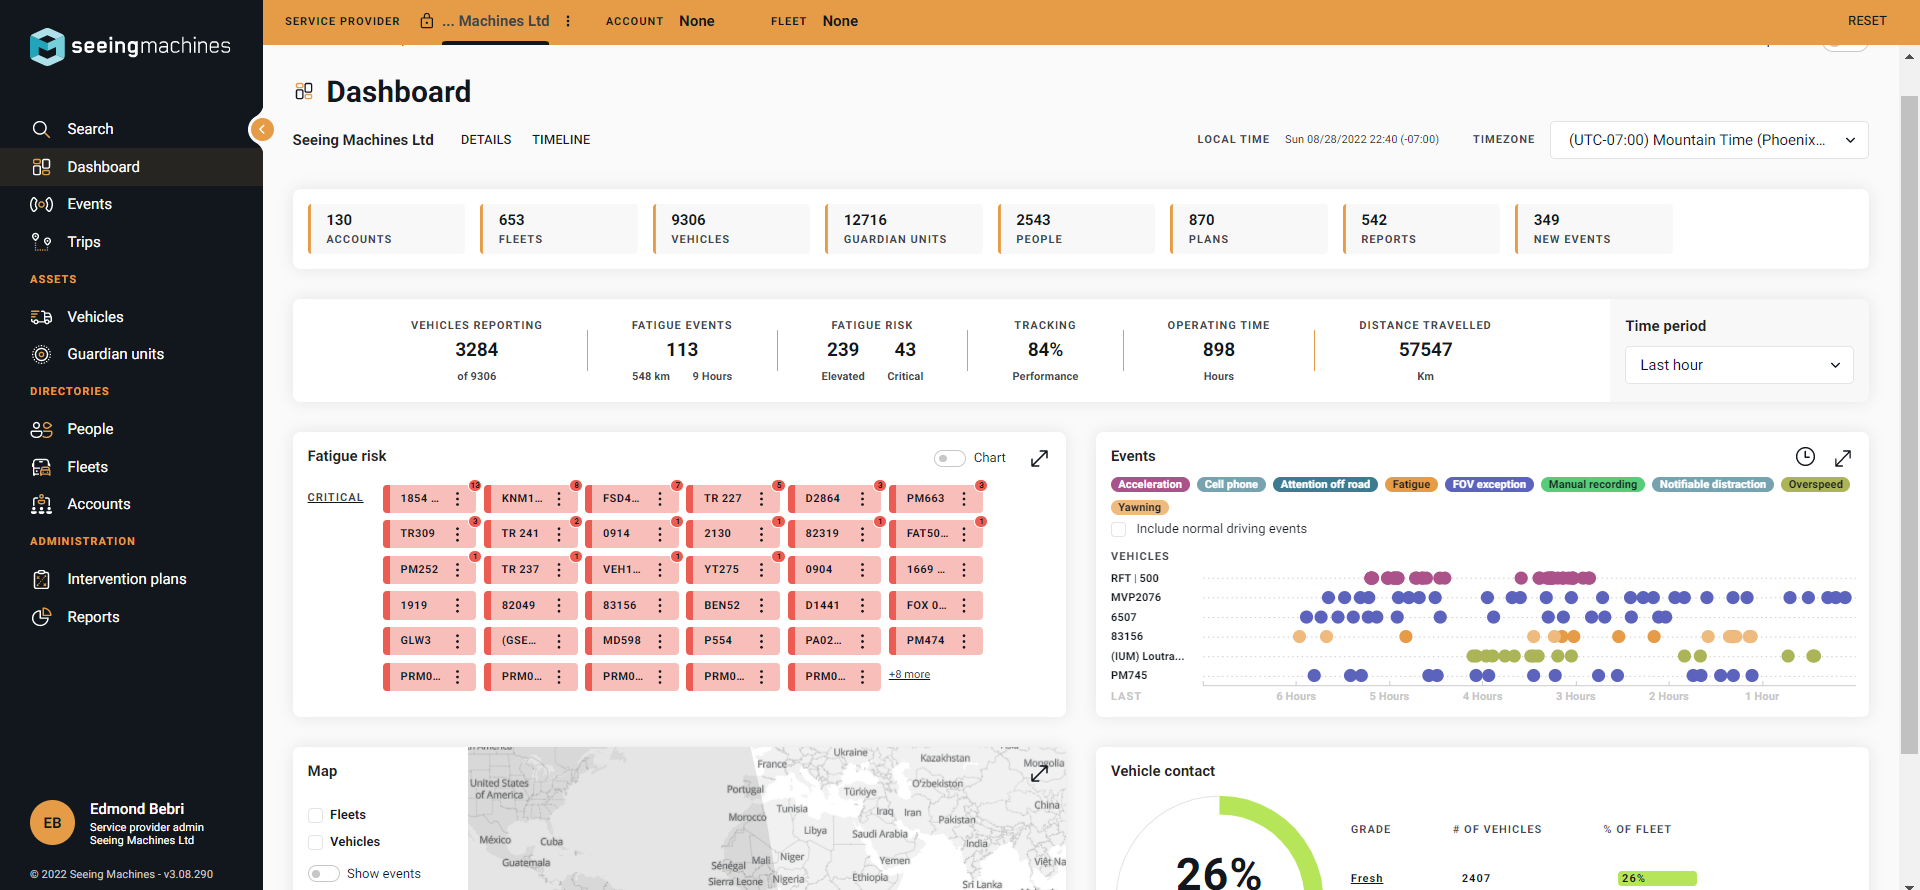
Simplify the View
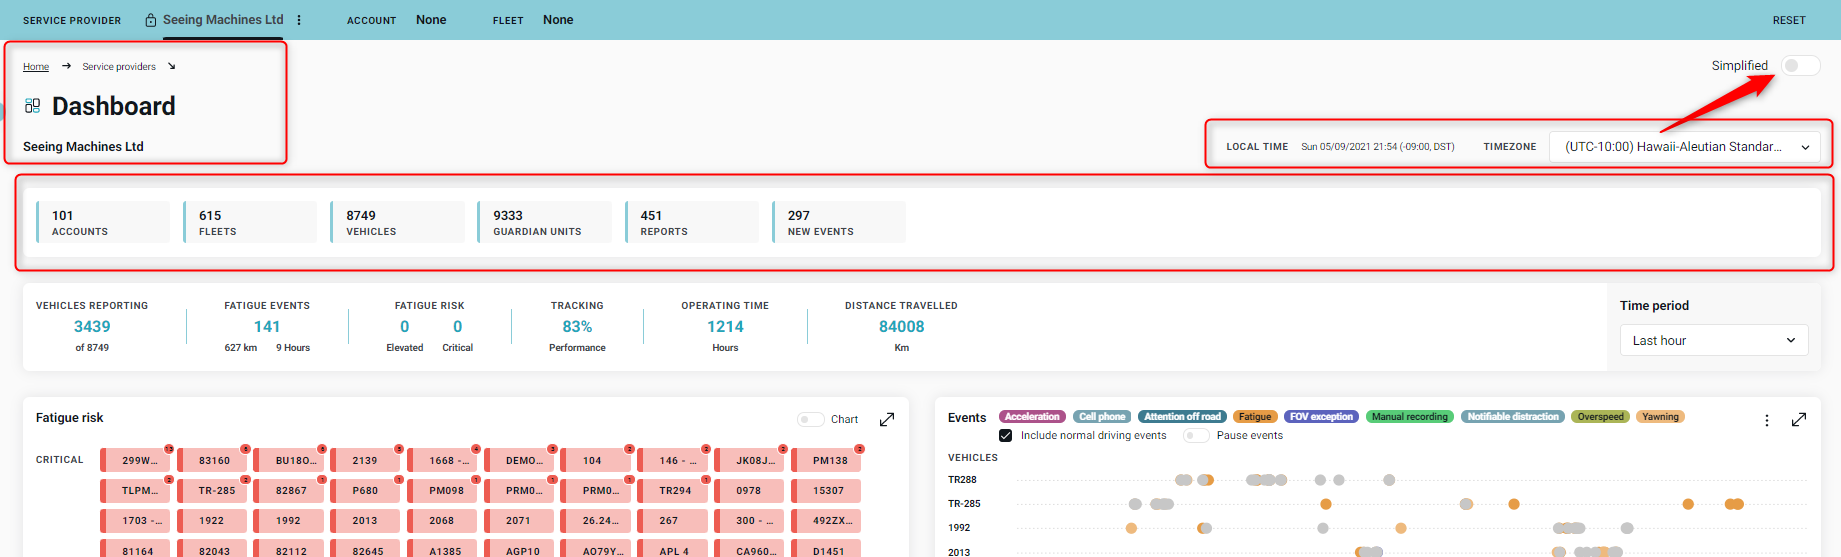
Users can simplify their view on any content page. Clicking on the ‘Simplify’ button will reduce non-essential information. The amount of information that will be hidden will depend on the content page the user is viewing. The below image shows what will be removed (in the red boxes) from the Dashboard in the simplified view.
Breadcrumbs
There are breadcrumbs visible on the content page to help you understand where you are. Users can click on the breadcrumbs to quickly take them back to their original view.
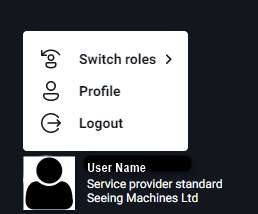
User Profile
The user profile is located at the bottom left of the screen.
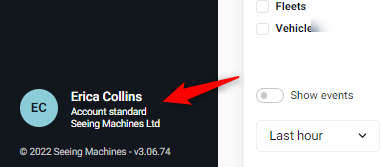
From here users are able to:
- Switch Profiles (if they have ‘Guest Grants’),
- Update their profile and preferences, and
- Logout

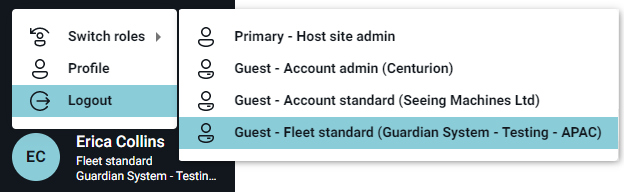
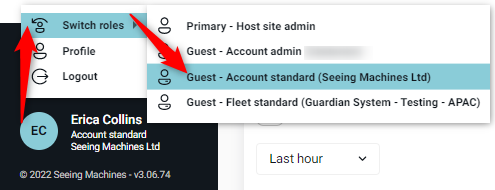
Switch Profiles
Users with ‘Guest Grants’ will be able to access their other profiles here.
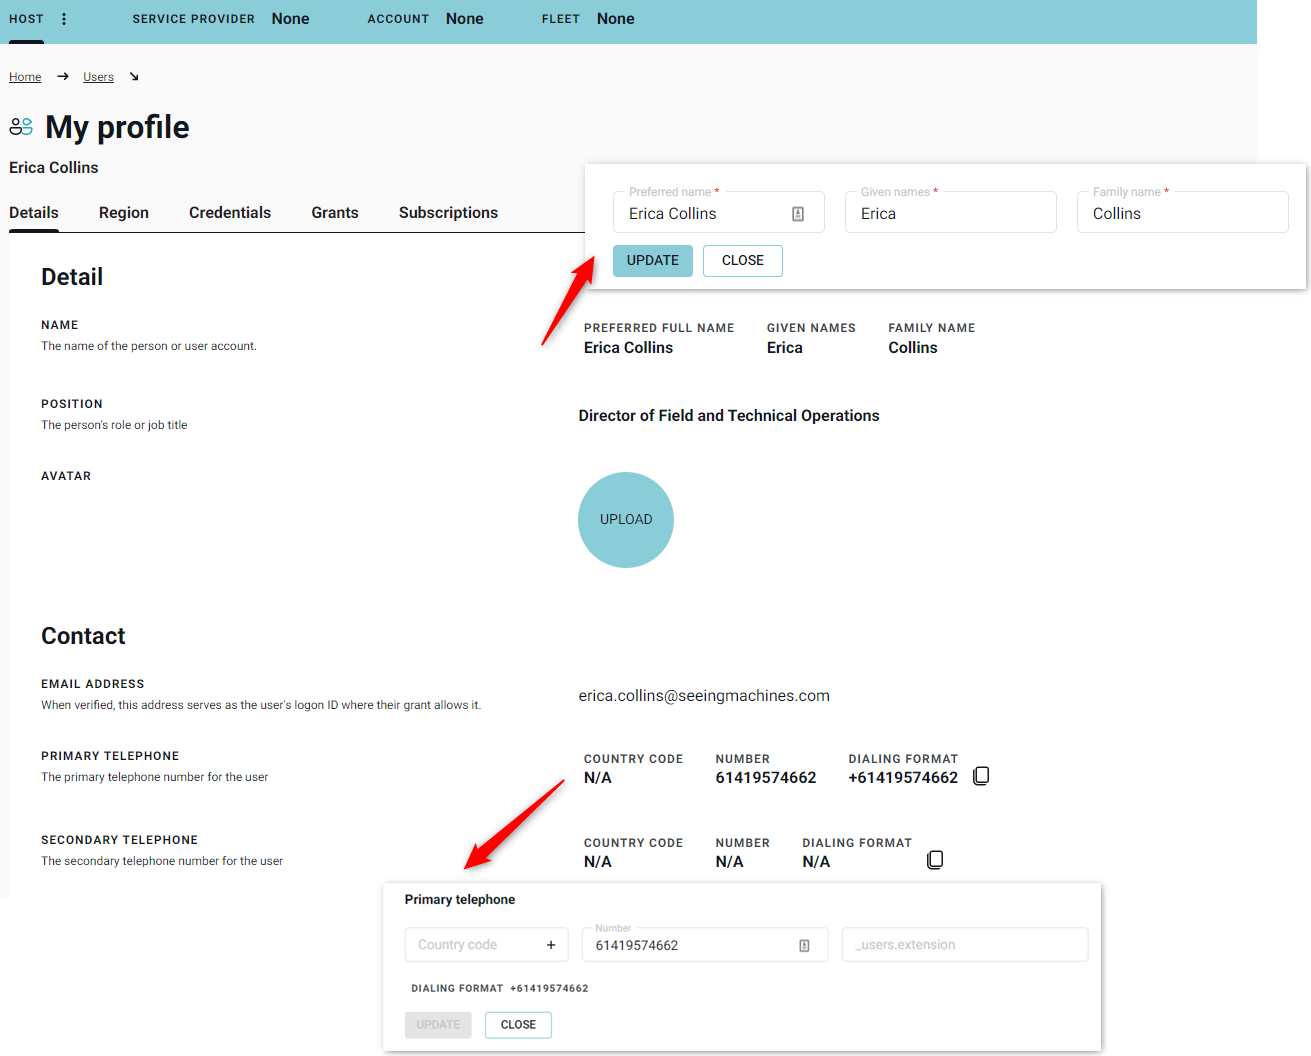
Details Tab
Under the ‘Details’ tab, users can update their name, position, and phone numbers.
Preferences Tab
Under the ‘Region’/’Preferences’ tab, users can update their preferred Timezone, Language, Measurement, and Temperature. Note – not all languages are supported however, this article may assist users to translate English to their preferred language.
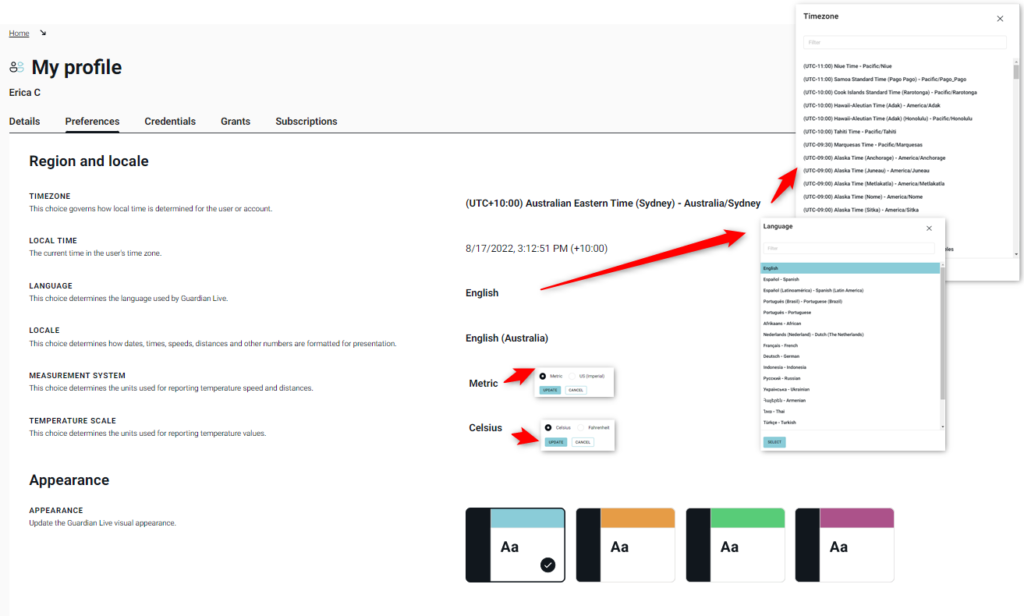
Users can also change the colour of the Scope Bar and the Icons in the Main Navigation Pane from this tab.
Once applied, the appearance of the dashboard will change
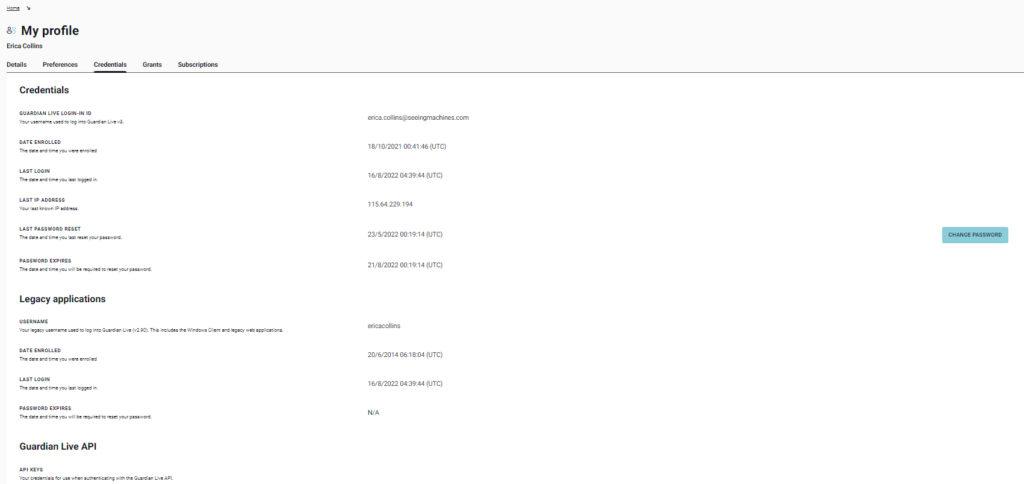
Credentials Tab
Under the ‘Credentials’ tab, users can only change their password (the user must know their current password to complete that action – if that is not known, then the ‘Forgot’ password action can be used). Users can see the date that they last logged in and when they were initially enrolled in Guardian Live. Users can also see the date that their password expires.
Grants Tab
If the user has additional Grants, they will be able to see that information on their profile. Users are not able to update any content on this tab.

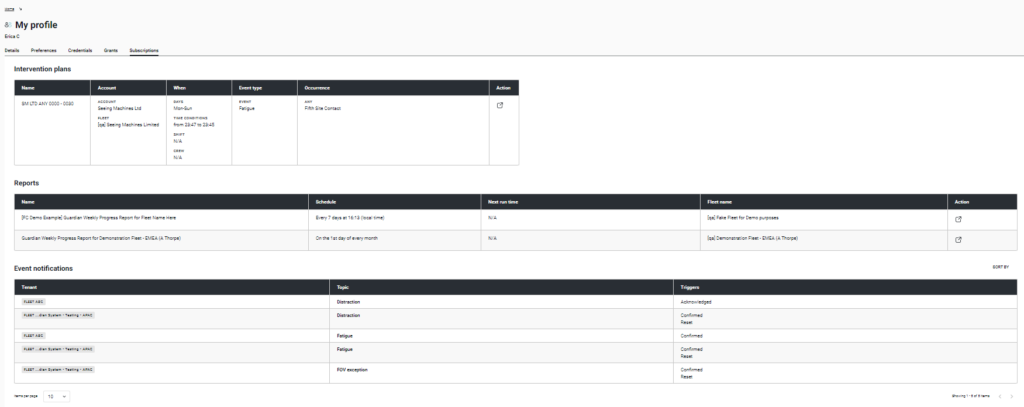
Subscriptions Tab
If the user has been subscribed to received FIP phone calls, reports, or event notifications they will be able to see that information on their profile. Users are not able to update any content on this tab.
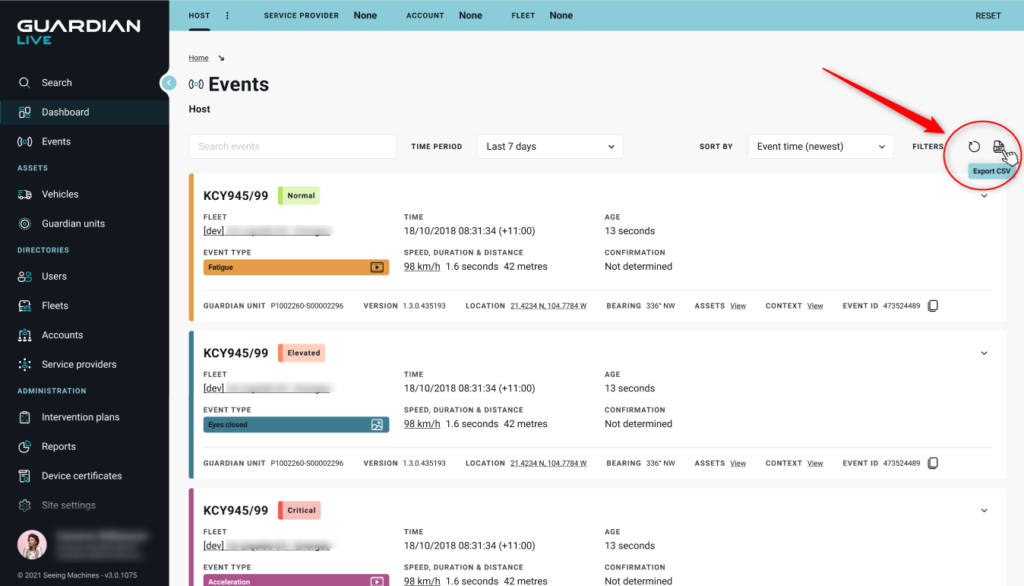
Export Data
Users are able to Export Data from the Event View page. If the data is visible to a user on the page, then they will be able to download it. Currently the exports are available for:
- Events
- Fleets
- Accounts (if the user’s Scope allows them to view Accounts)
- Vehicles
- ***COMING SOON*** Guardian Units
Where a Data Export is permitted, this icon ![]() will be visible at the top right corner of the data. The report will be a .csv file format.
will be visible at the top right corner of the data. The report will be a .csv file format.
When clicked, the user may be presented with a pop-up to allow them to enter a file name (this will depend on the browser and how the user has configured downloads to work). For Chrome users, the download will go directly to the Downloads Folder.
The report will be limited to the user’s scope (Account or Fleet). All data in the view (including any filters applied) will be exported. If a date filter has been applied, all data for that date range will be exported.
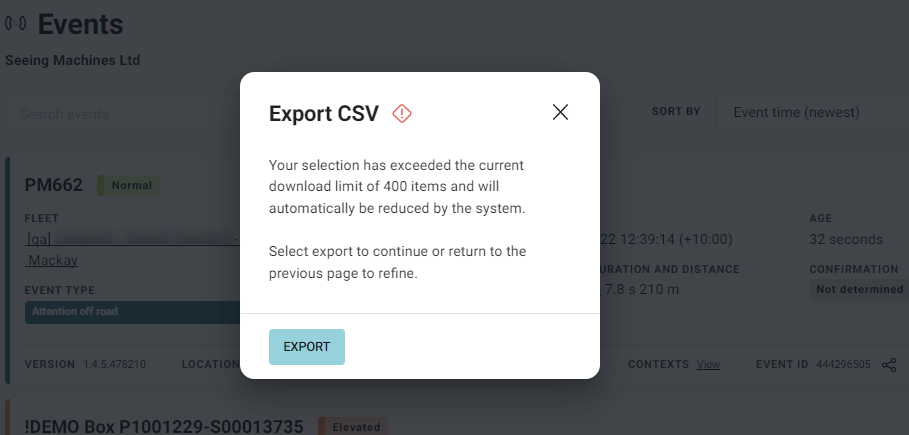
Where the amount of data requested for extraction exceeds the limit (2,000), an error will display showing you the download limit number.
Bookmarks and Shortcuts
Any page in the website can be bookmarked using your browsers method for bookmarking.
The URL is designed to help users quickly navigate to the page they need. For example, …guardianlive.io/#/account will take you to the list of Accounts. …guardianlive.io/#/fips will take you to the list of FIPs users are permitted to view.
To bookmark the dashboard, use …guardianlive.io/#/dashboard. To bookmark the login simply use guardianlive.io.
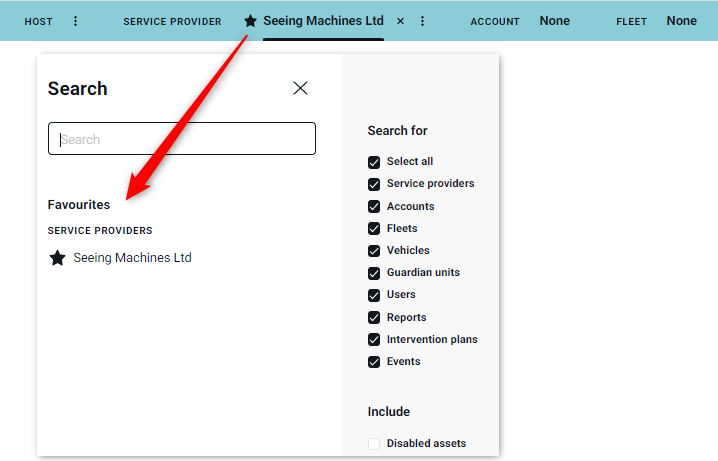
The Scope Banner provides users with the option to select a ‘Favorite’ Fleet, Account, or Service Provider (depending on their Scope). When using the global ‘Search’ function, favorites are listed.
Logging Out
To log out, the user will need to click on their Profile Picture and select ‘Logout’.
Once clicked, the user will be returned to the log in page.
