Bulk Event Notifications to Email or Message Queue
When you are onboarding and setting up your fleet, it is recommended that you employ the same methodology that you have utilized for your previous fleets, and endeavor to complete the process expeditiously. This is a frequent occurrence, as numerous feature requests have been received for such functionality.
To facilitate the continuation of current workflows, it is recommended to provide support to the support team in onboarding new fleets by streamlining the process. The current process may entail the team adding each user or topic individually, which can be time-consuming and prone to errors. The new approach should aim to expedite the process and reduce the margin of error. Additionally, the recent feature update not only enhances the support for amendments to notifications but also offers a more accessible and comprehensive view of the existing setup. This is exemplified by the account notifications tab, which displays the set-up rules for all individual fleets. This feature enables the identification of any missing elements and mistakes, providing an opportunity to rectify any errors. Therefore, when onboarding a new fleet or customer, or reviewing arrangements for existing customers, it is recommended to utilize this streamlined approach and view the setup via the account notifications tab to ensure accuracy.
Bulk Add Event Notifications
In order to Bulk add event notifications,
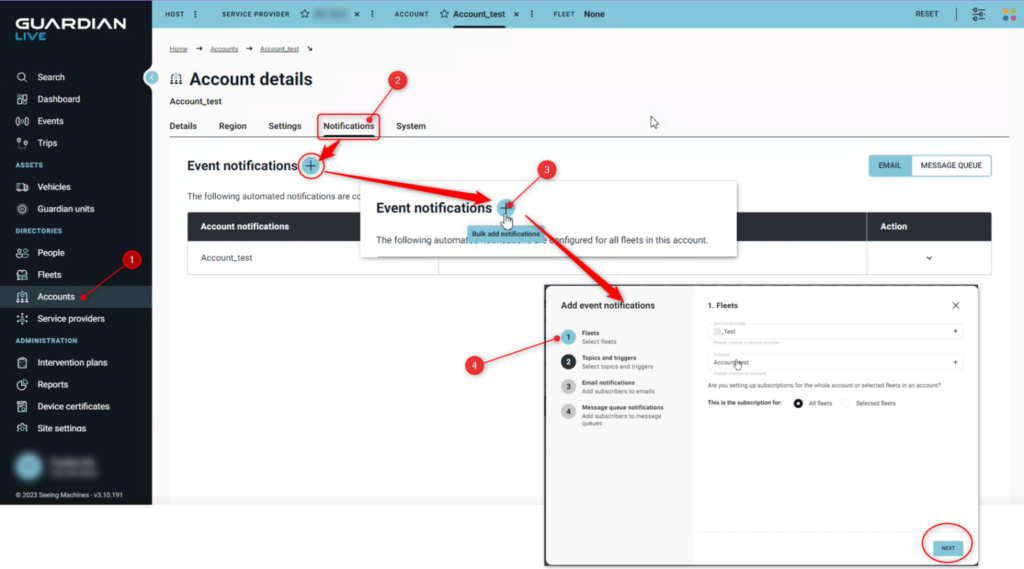
- the user can go to the Account or Fleet page.
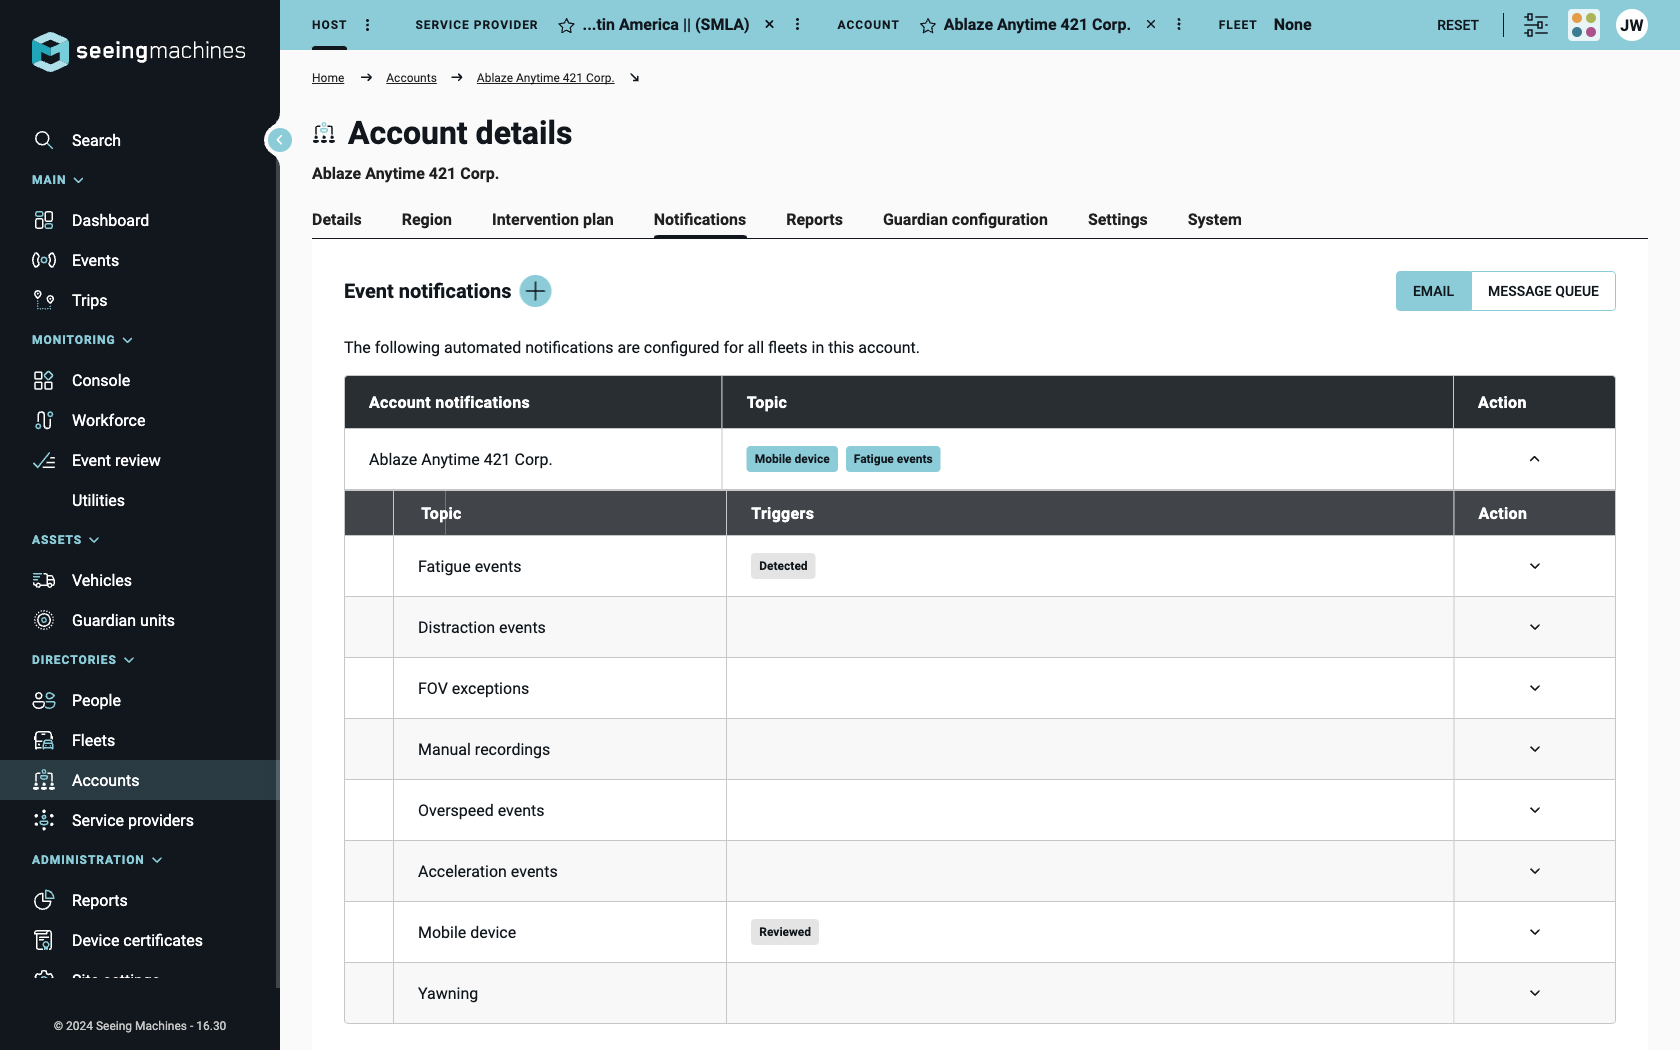
- Go to the Notifications tab. On the notifications tab, you will be able to view all the event notification rules set up for the specific account/fleet.
- To add new Event notifications in bulk, click on the “+” add icon.
- This will open a stepper that the user needs to follow. For the mandatory fields, it has an *. After filling all the required fields the user will be able to click on Next to get to the next step.
Add Event Notifications Stepper
If you are currently in the process of onboarding a new fleet, onboarding a new customer, or reviewing the arrangements of existing customers, it is recommended that you utilize event notification rules in the most effective manner. This can be accomplished by reviewing the rules on the account notifications tab, which offers a more comprehensive and accessible view of the current setup. By doing so, you can easily identify any missing elements or mistakes, ensuring accuracy and timeliness in the onboarding process
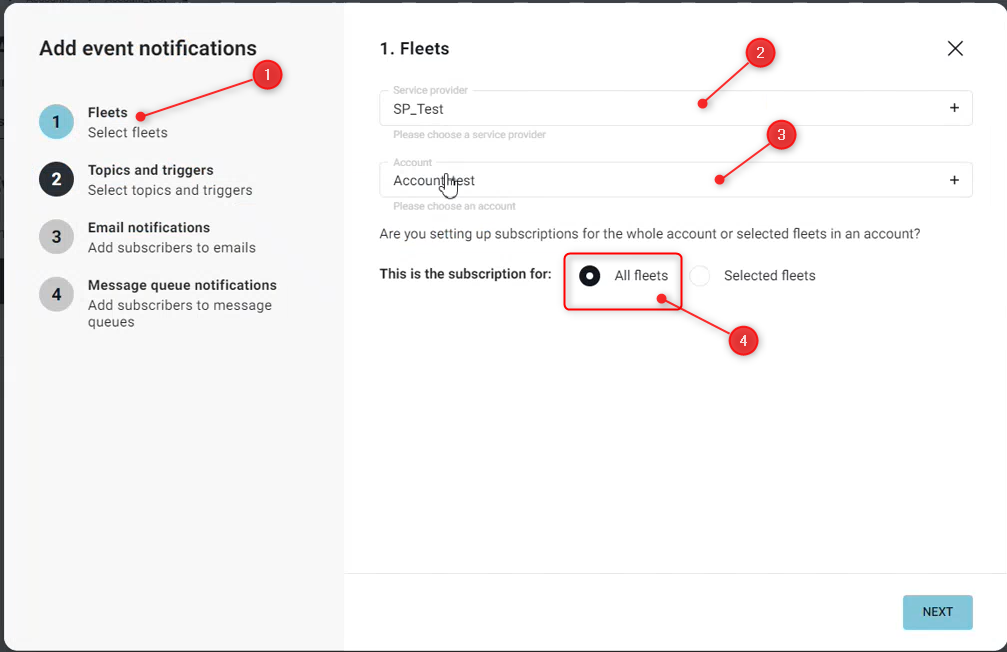
- The stepper starts with the select Fleets step.
- Select the service provider you want to add the event notifications to.
- Select the account to which you want to add event notifications to.
- There are 2 options for the subscription. You can either select “All Fleets” or “Selected Fleets”.
Suppose you are adding event notifications to all the fleets in your account at once. And click on Next to go to the next stepper. 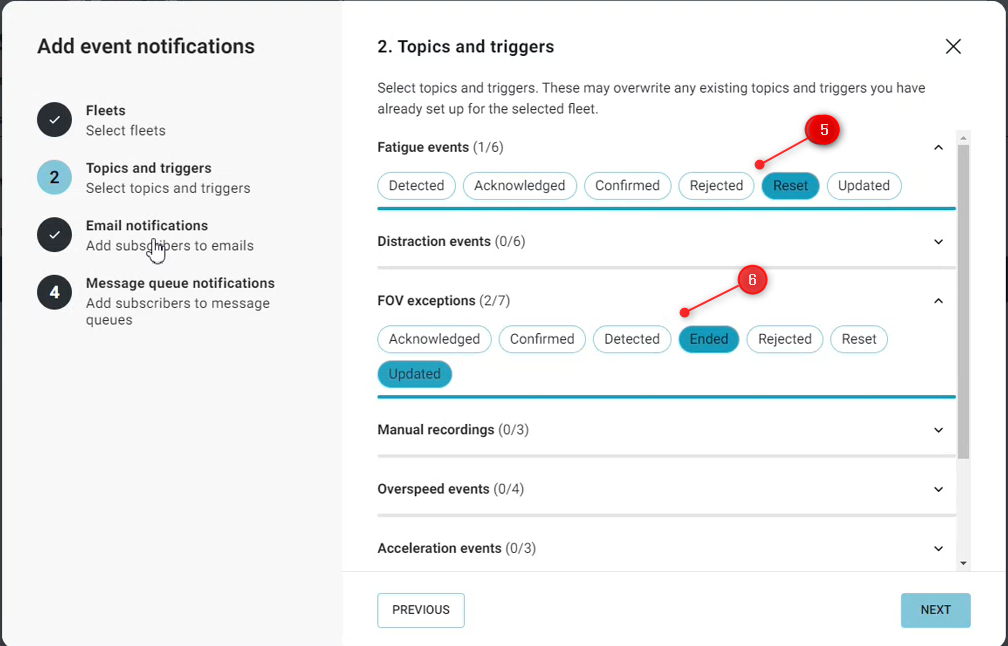
- Select the topics and trigger that you want to create the event notifications.
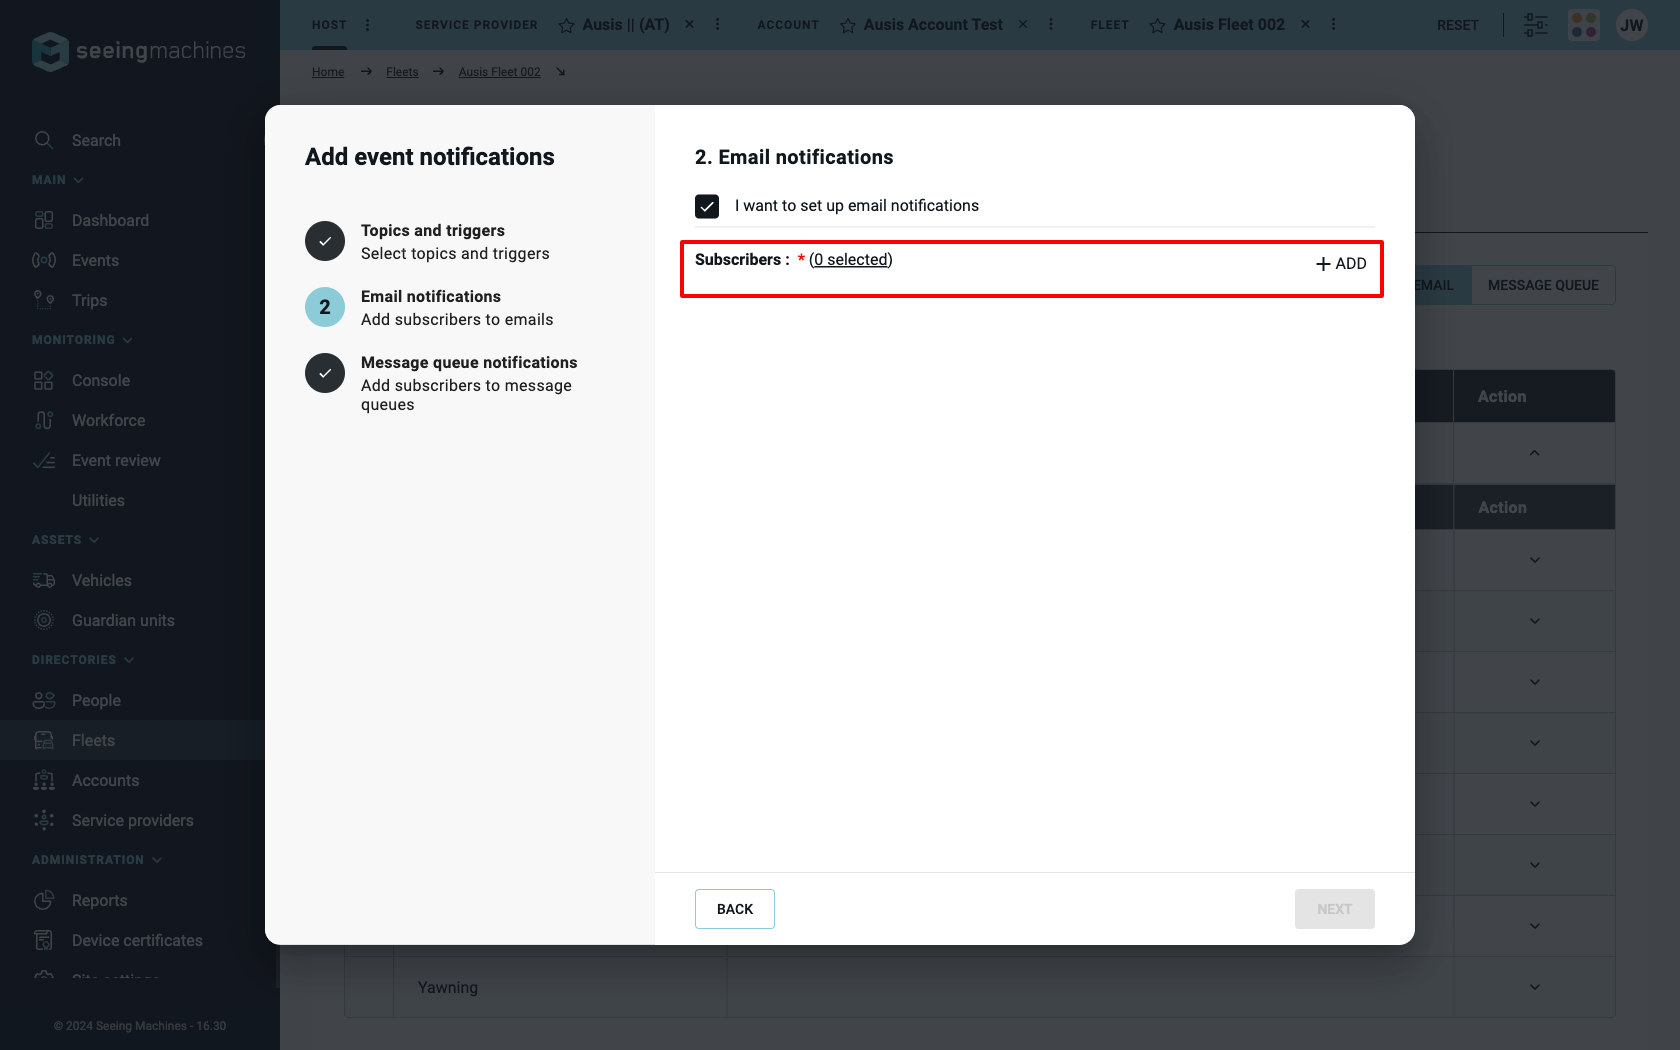
- In order to set email notifications, click on the checkbox and it will give 2 options that you can set up email notifications.
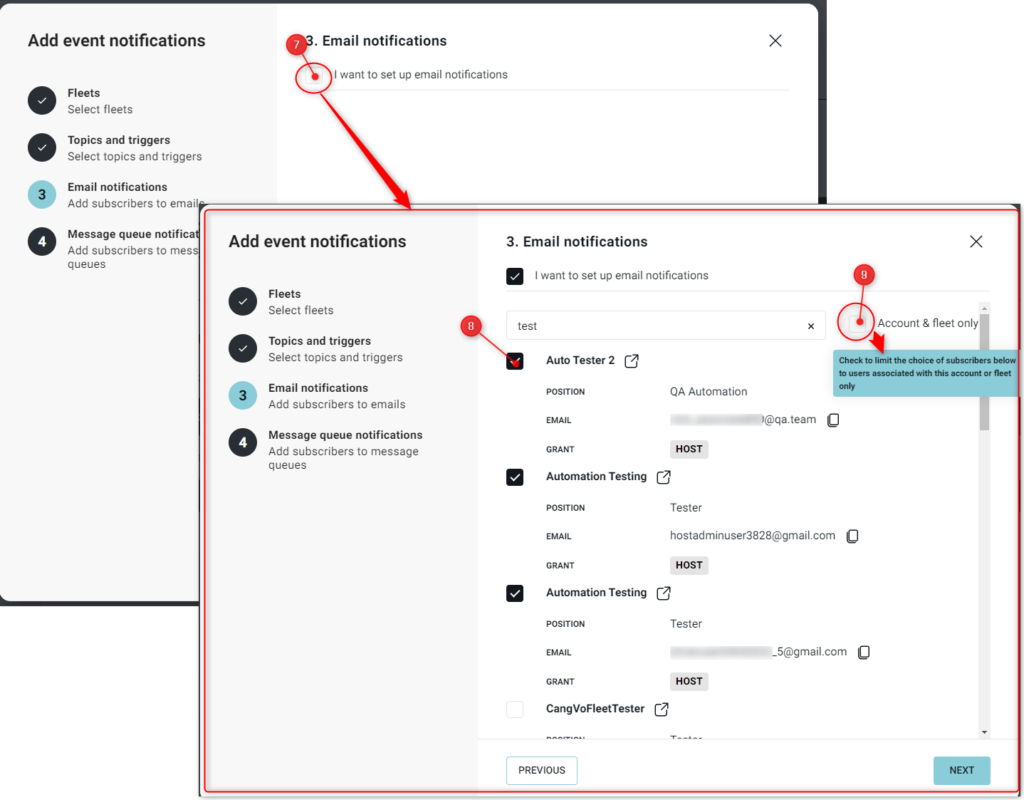
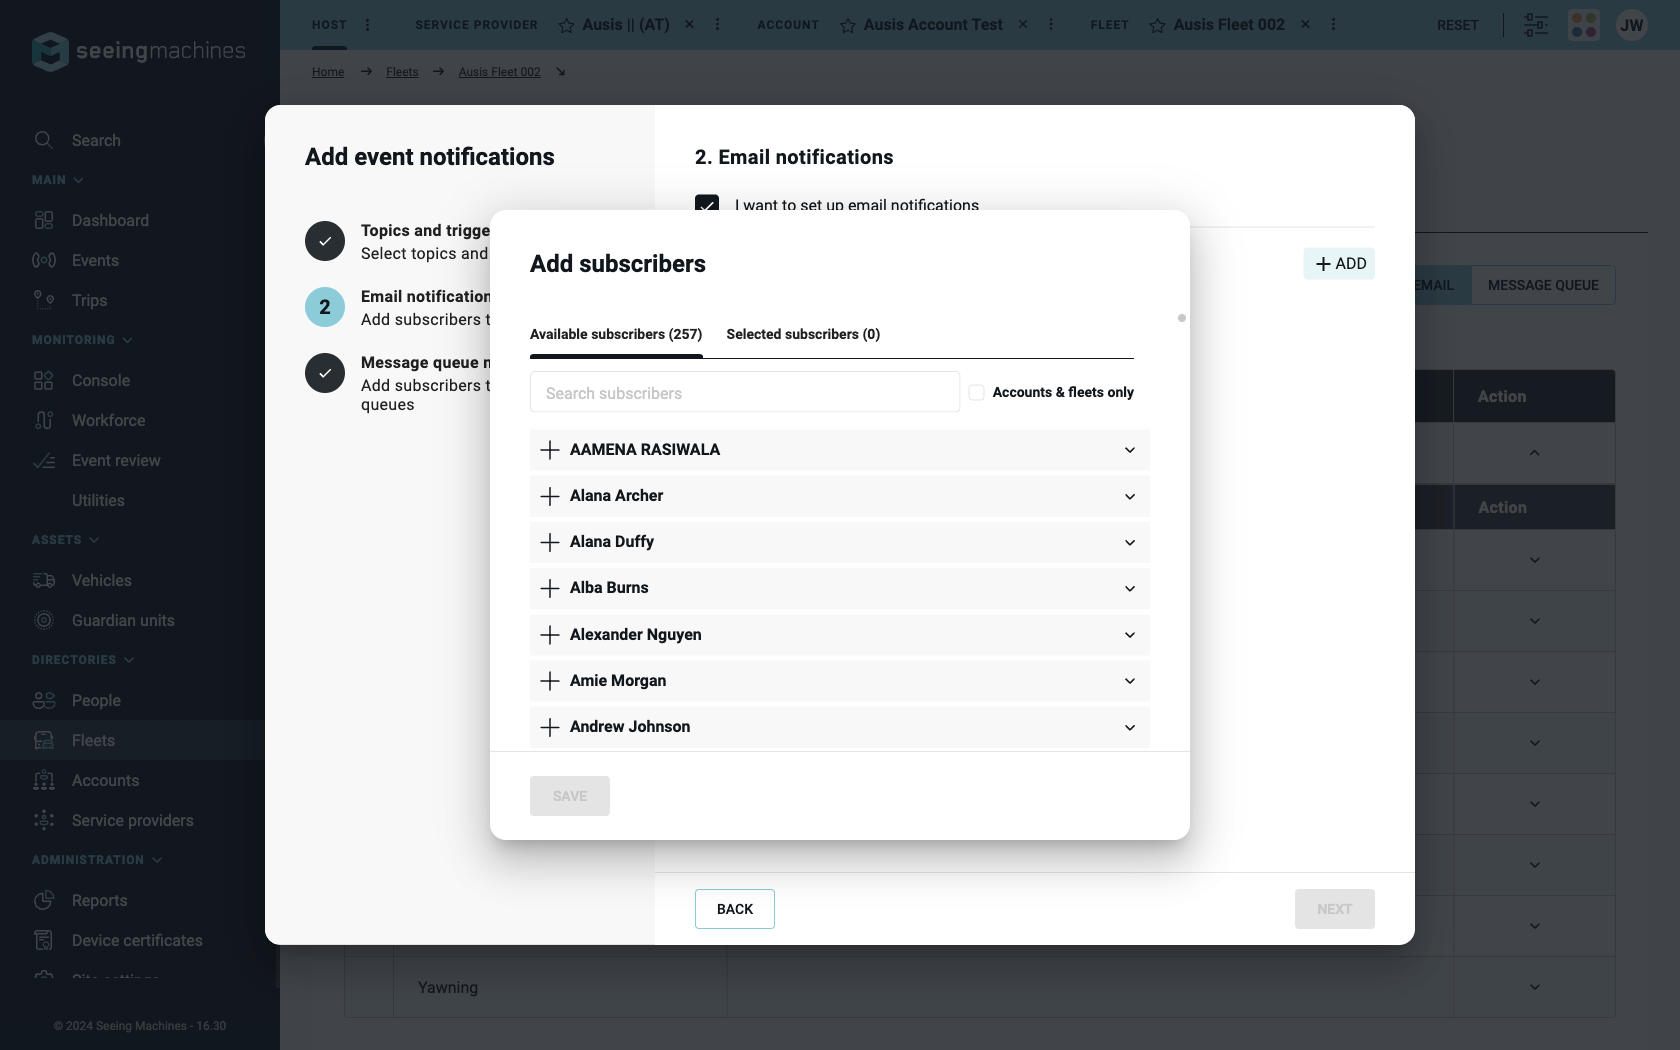
- By default, you will get the list of subscribers with the search bar at the top. In order to select subscribers to the event notifications just click on the checkbox and go to the Next step.
- If you would like to add this email notification to the entire account/ fleet, just click on the checkbox, that says Accounts and Fleets. It will give the accounts and fleets available under the user which can be easily selected by checking the checkbox.
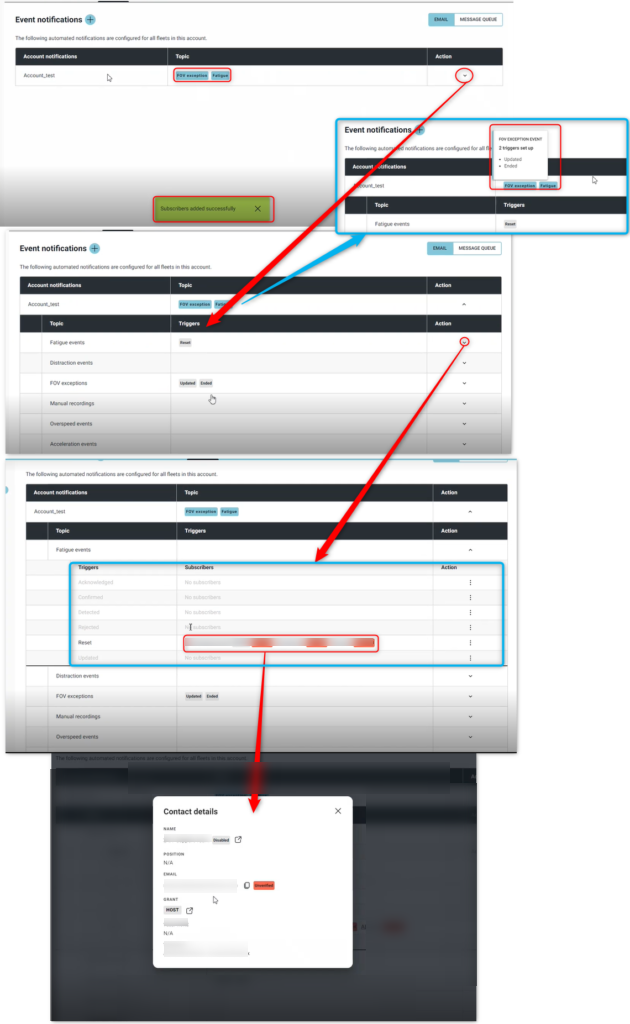
- This will create the Event Notifications according to the added criteria. It is displayed in the Event Notififcations table first on the Account Notififcations level, which can then be opened into Different topics, each topic can then be expanded into the set of triggers. This will have all the triggers that you added under that topic in addition to the subscribers that were added in the process.
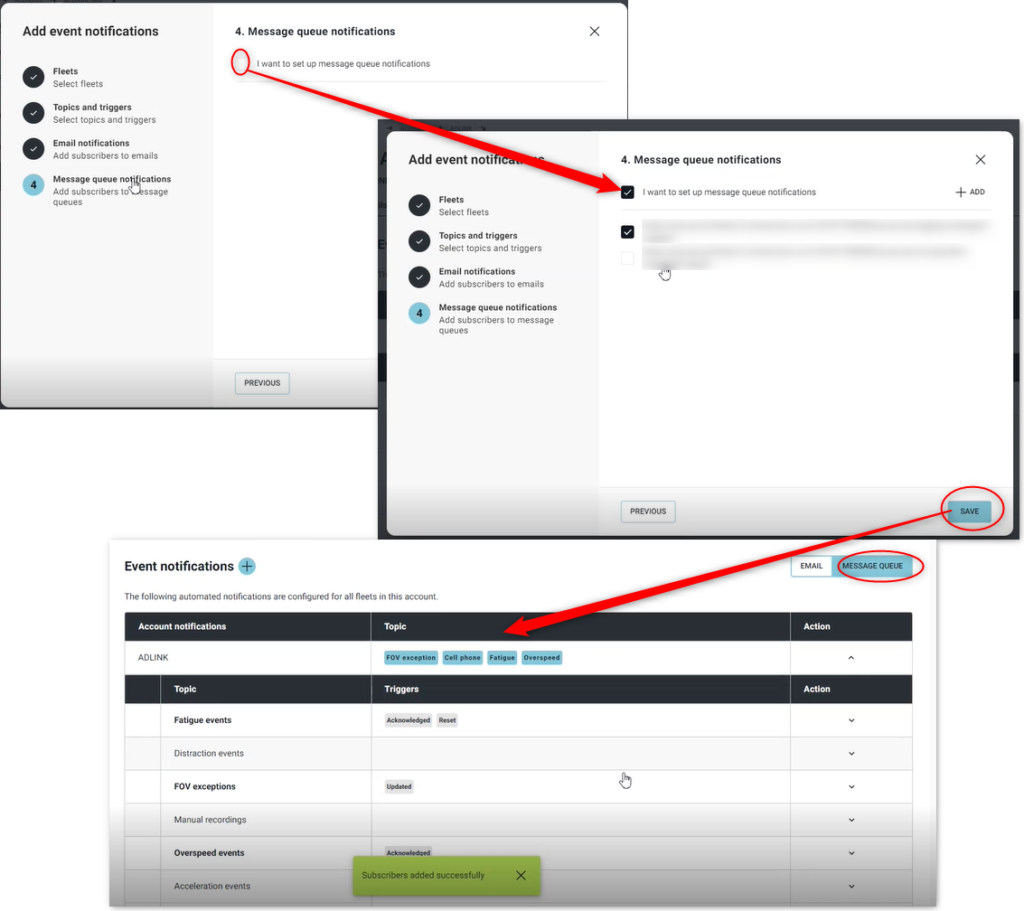
- The next step will lead the user to the Message queue stepper. You can either skip this step or Add a message queue here. On clicking next, it will open the Message Queue toggle under event notifications and should show the message queue if successfully added under the desired set of topics and triggers.
Event Notifications to Email
Event Notifications can allow Guardian Live users to receive an email when a Guardian Event is reviewed, detected, rejected, updated or ended. Event Notifications can be created at the account level or fleet level.
Users with administrator grants at account scope or higher are permitted to view, create or edit Event Notifications by Email. Users can view the notifications they are subscribed to, but they cannot edit them. This article will explain how Admin users complete that task.
Add Users to Notifications
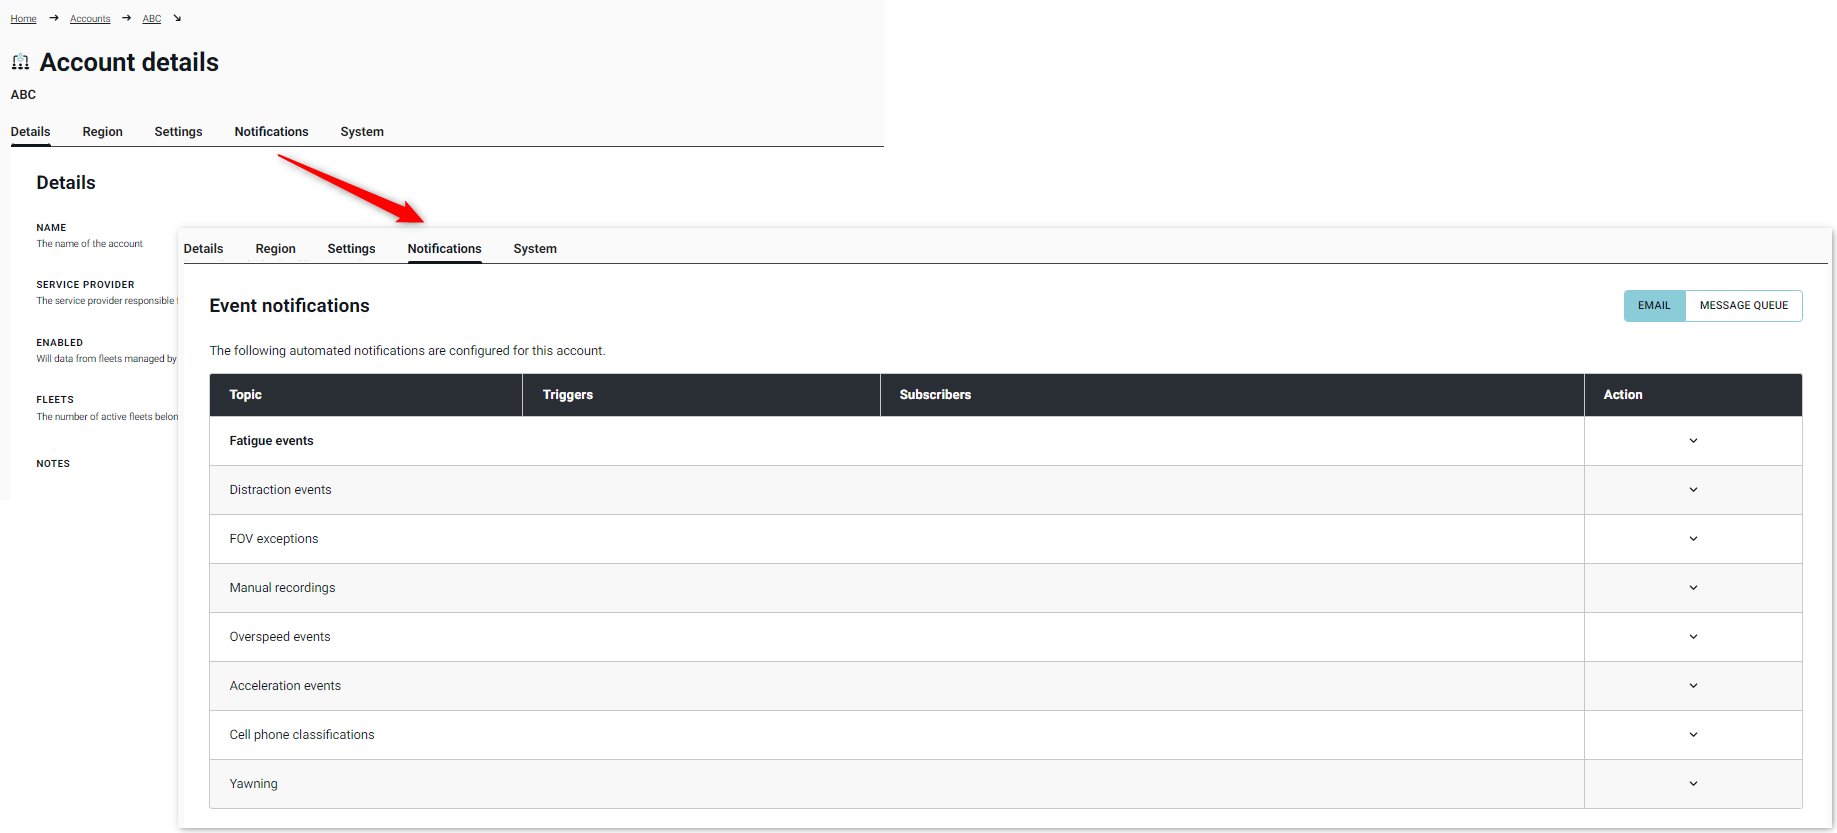
Admin users will click proceed to the ‘Notifications’ tab within Account or Fleet ‘Details’ to add a subscriber to Event Notifications.
| Step | Description |
|---|---|
| Locating the Notification Tab | Account
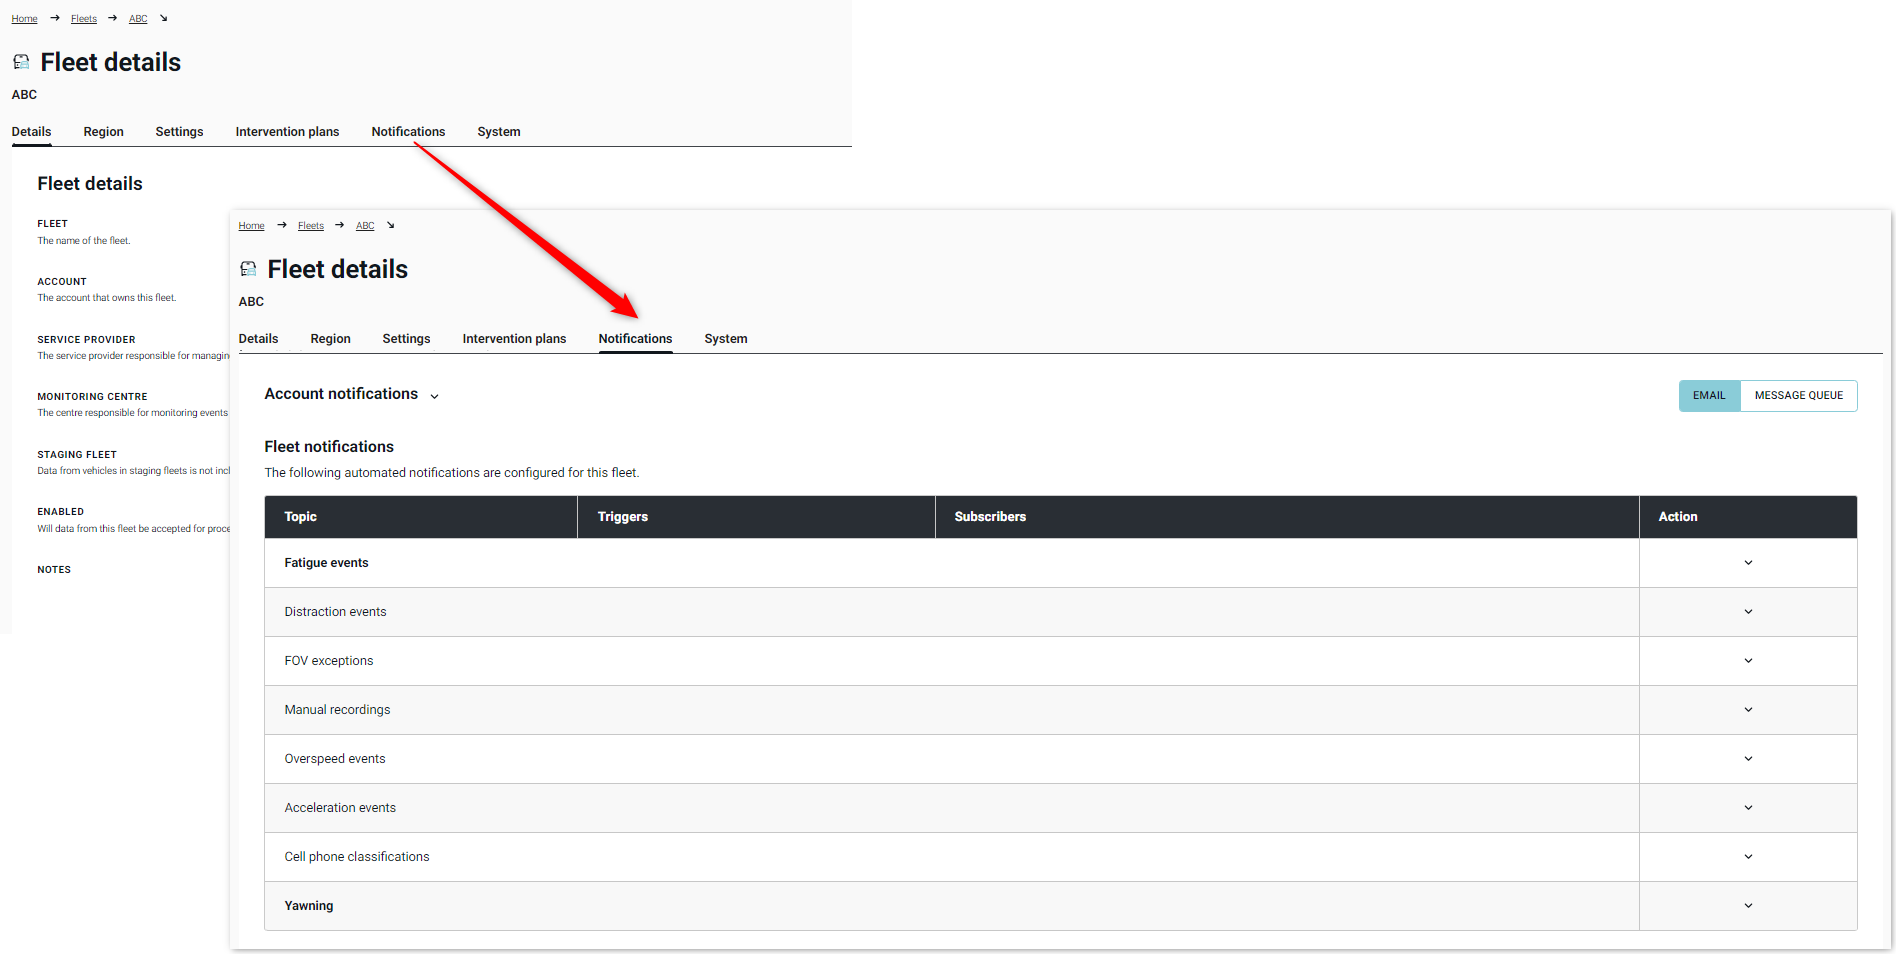
Fleet
|
| Adding Subscribers | Select the event type and trigger that will generate the email.
Once added, the subscribers will be visible under the ‘Subscribers’ column. The subscription will commence as soon as the user is added. Note – only Contacts with the correct Scope will be able to be added as a Subscriber. Note – Contacts added for subscription purposes can be Associate users if they do not need to have access to other Guardian Live information. |

When a user has been subscribed to receive Event Notifications, it will be visible under the users details.
Edit a Subscriber
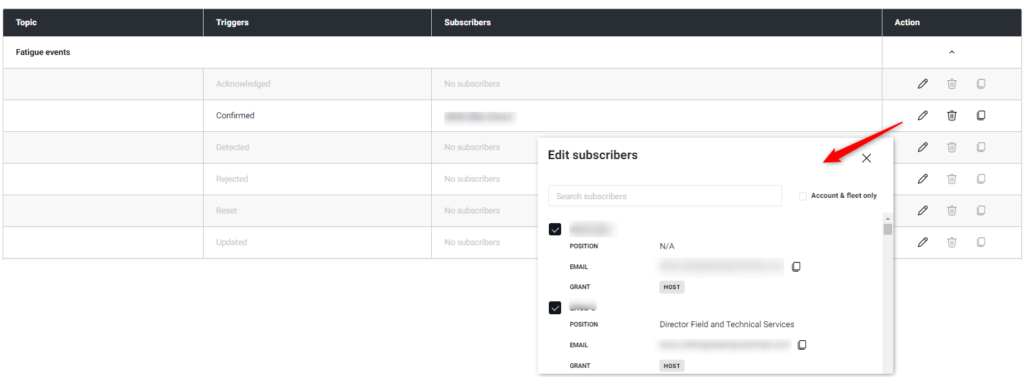
Administrative users are able to add or delete subscribers. Events with subscribers will be in bold. Clicking on the pencil will show the list of subscribers. From here subscribers can be added or deleted. To delete a subscriber, untick them from the list.
Copy and Paste Subscribers
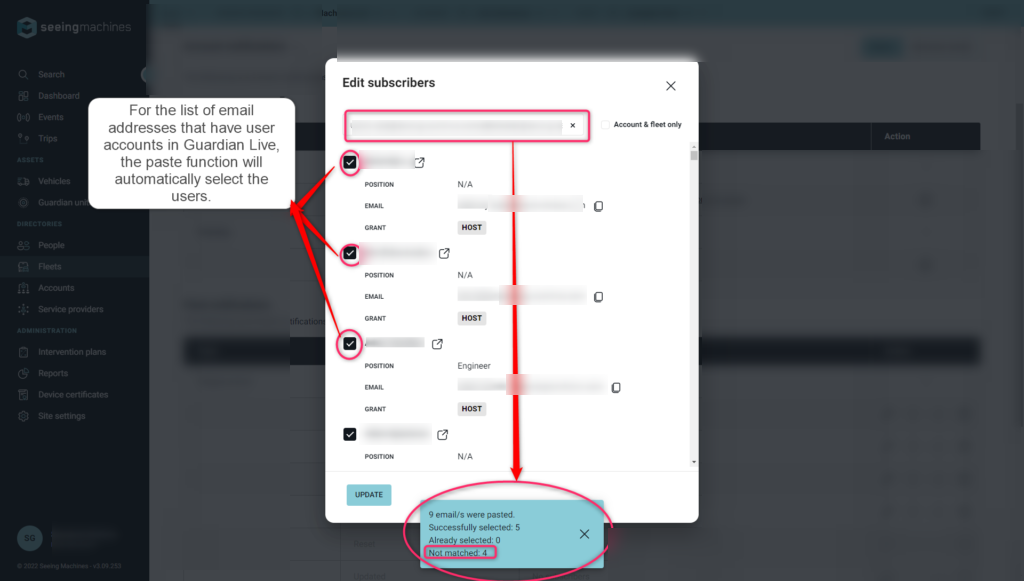
The users will be able to copy the list of subscribers from any of the subscriber’s lists and paste it into any other subscriber list groups. The users can also copy a list of subscribers from outside of the application and paste it here, it will automatically select the users on Guardian Live with those email addresses.
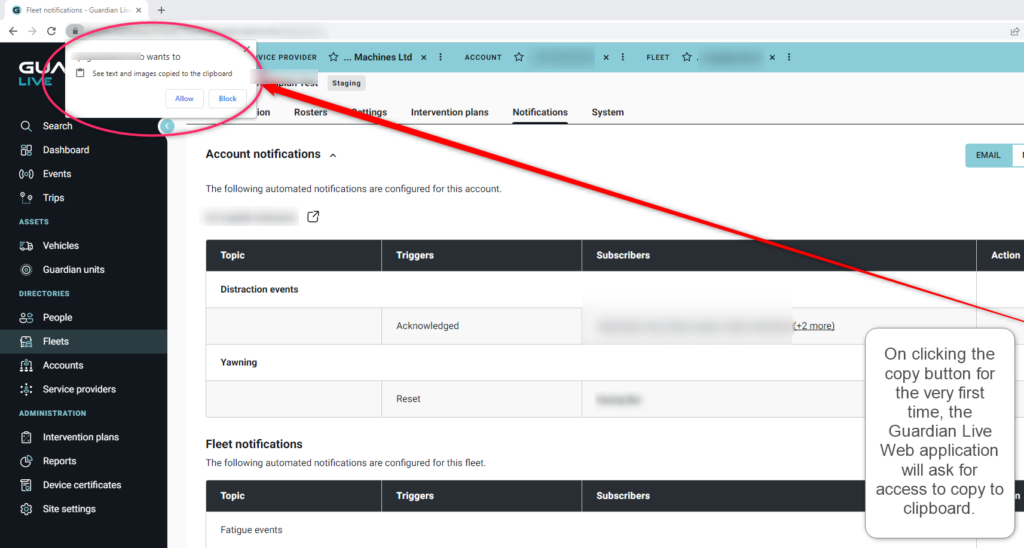
- Copy Function. When the user is trying to use the copy-and-paste feature for the first time, a pop request will open up asking for access to the clipboard. Press “Allow” and this feature will be able to copy any valid list of email addresses from the clipboard and the paste button will be activated.
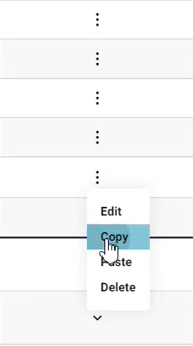
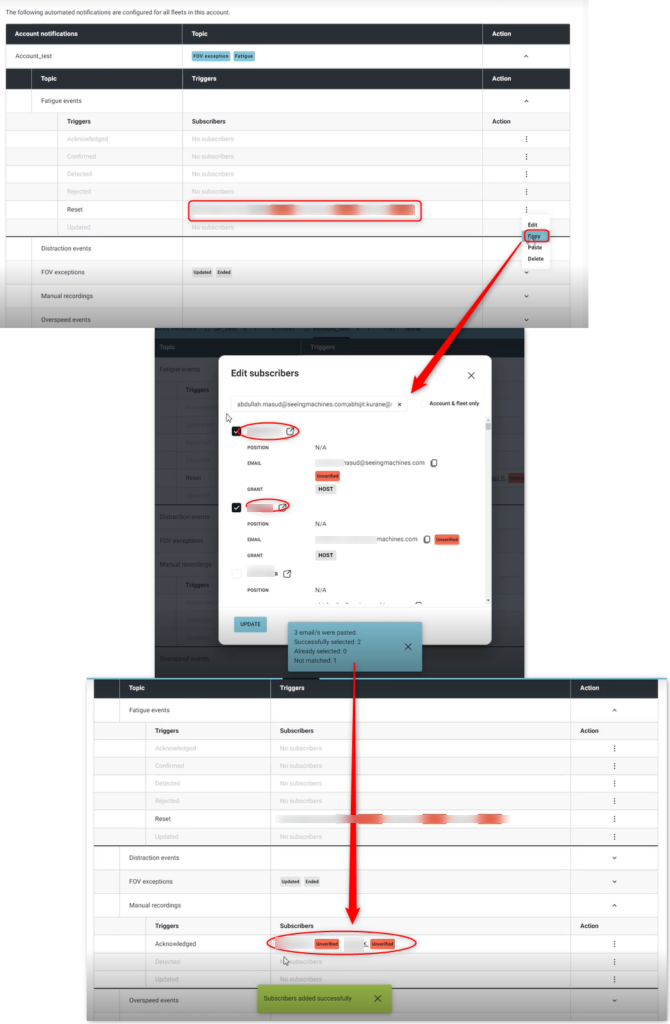
2. Paste Function. Once there is a valid list of email addresses copied, the paste icon is activated and you can simply click on it to paste the list in the topic/trigger.
If the list of email addresses has user accounts in Guardian Live, the users are pre-selected which the admin can simply update by clicking on the update button. But, if there are any email addresses that don’t have user accounts with Guardian Live, they will stay in the search bar and the user is notified that a certain number of emails were not found. The email notifications can be sent to the email addresses that have user accounts on Guardian Live.
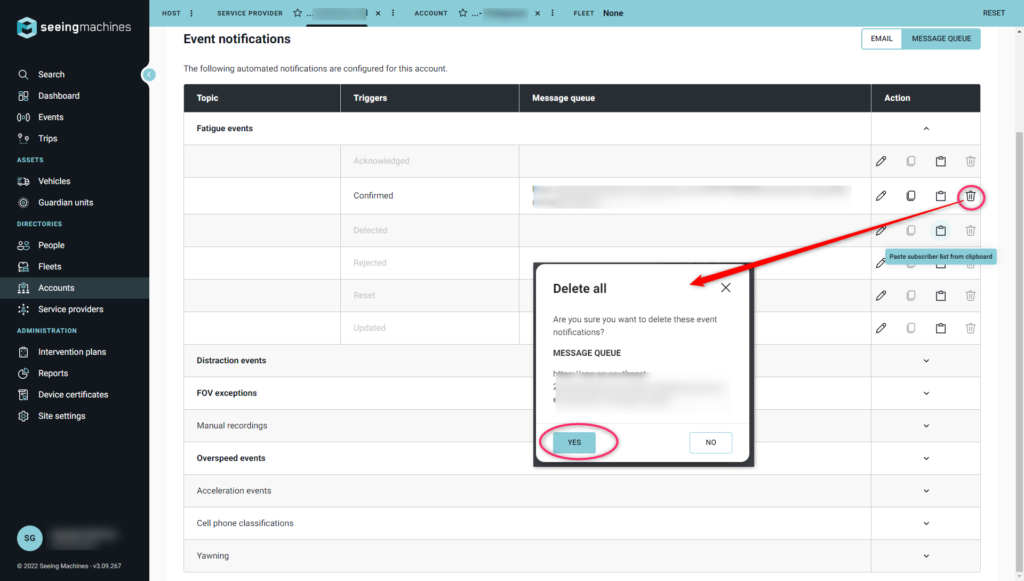
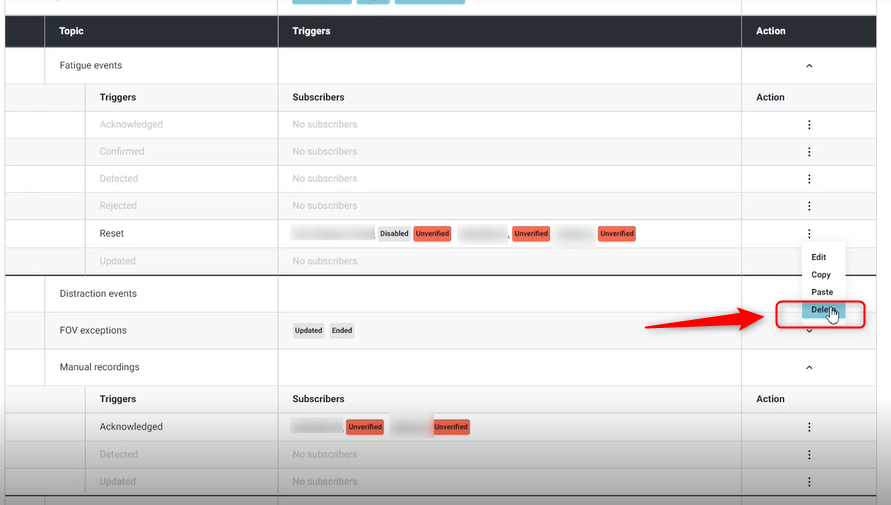
Delete an Event Notification
Administrative users are able to delete an Event Notification by using the Trash Bin icon. This will stop notifications from being generated and sent to the nominated subscribers.
Event Notifications to Message Queue
Event Notifications to message queue allow applications outside of Guardian Live to be notified of events as they are registered or confirmed in Guardian Live. Events are published in JSON format to an Amazon Web Services queue that can be queried by an application. Users with host scope or service provider administrator grant are permitted to view, create or edit Event Notifications to Message Queue.
Add New Message Queues
Admin users will click proceed to the ‘Notifications’ tab within Account or Fleet ‘Details’ to add a Message Queue to Event Notifications.
| Step | Description |
|---|---|
| Locating the Notification Tab | Account
Fleet
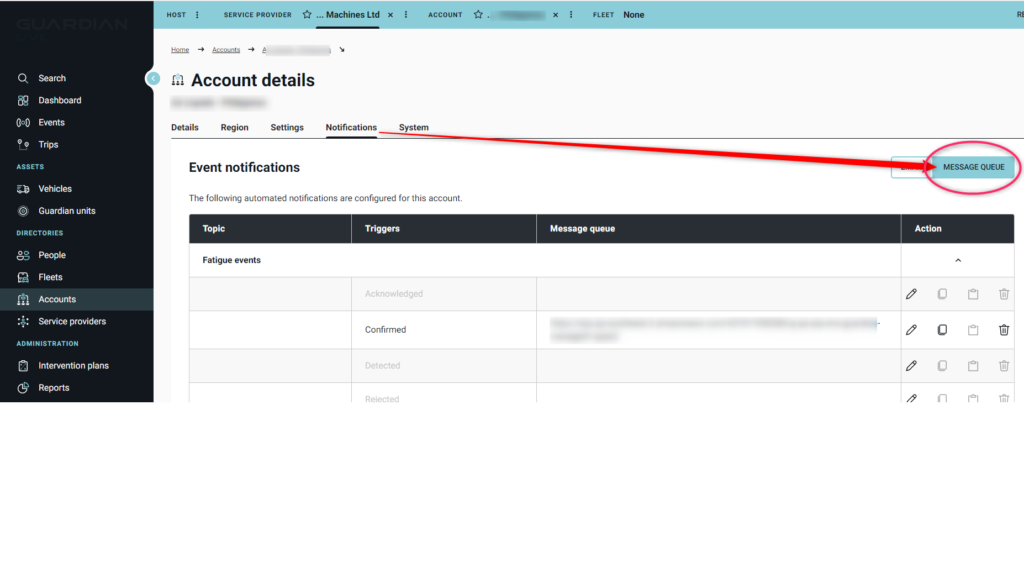
Toggle to the Message Queue. |
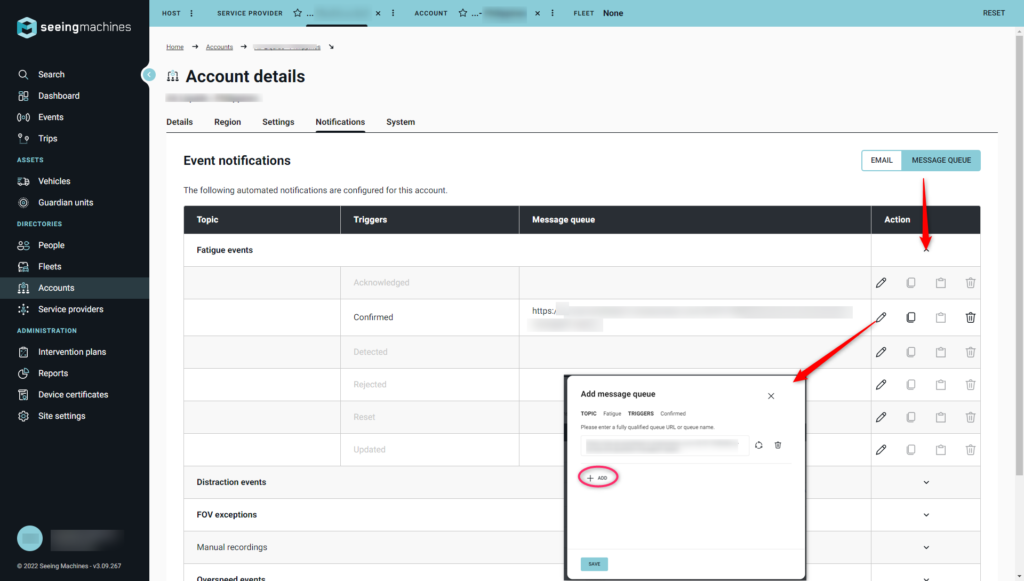
| Adding Message Queue | 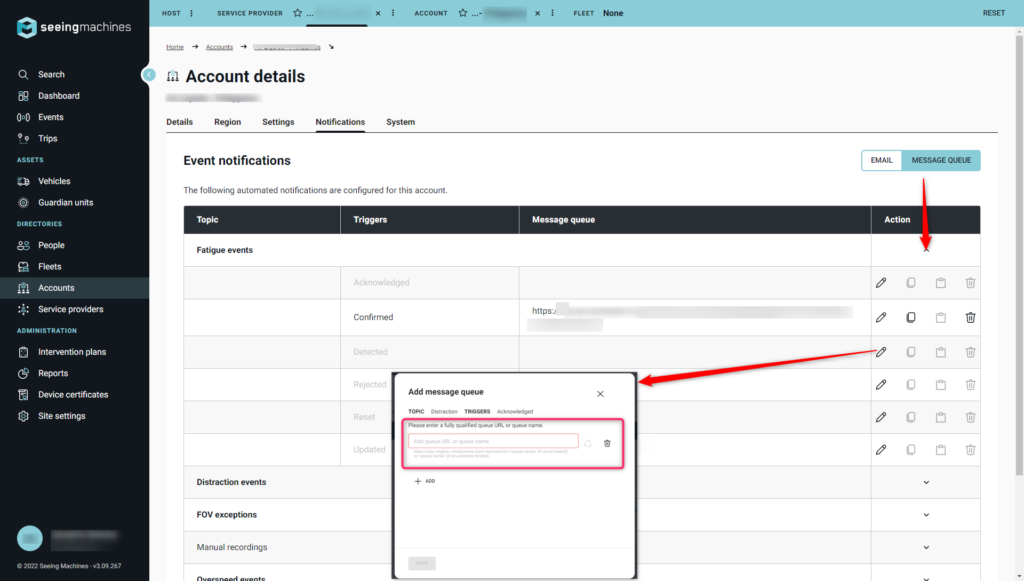 Select the event type and trigger that will generate the email via Message Queue. Select the event type and trigger that will generate the email via Message Queue.
Once the message queue url has been added, the user will be able to edit, copy, paste and delete the message queue. Note – only Contacts with the correct Scope will be able to be added as a Message Queue. |
Edit a Message Queue
Administrative users are able to add or delete message queue urls. Clicking on the pencil will show the list of subscribers. From here message queue can be added or deleted. More message queues can be added or edited. To delete a message queue, simply click on the bin icon.
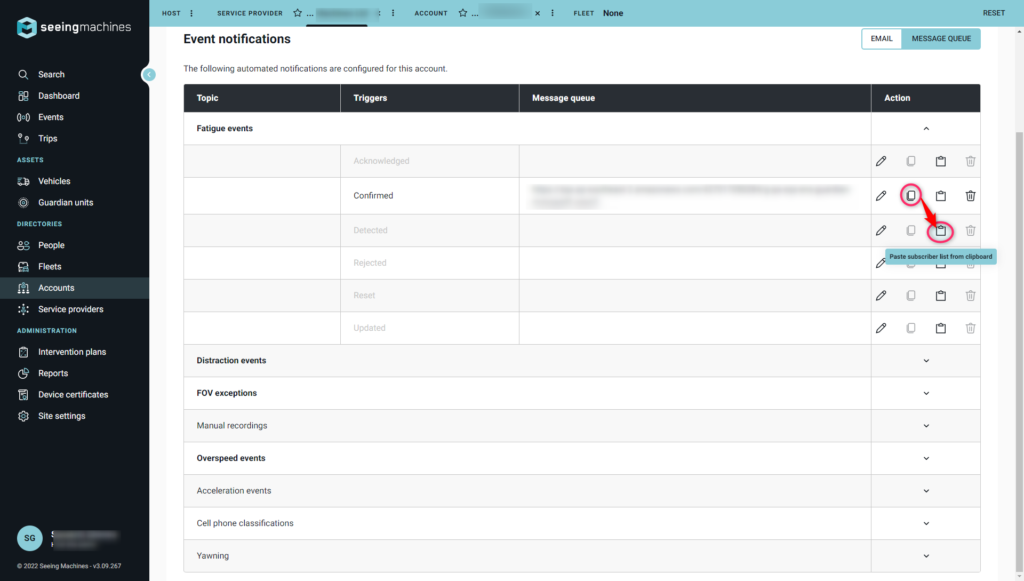
Copy and Paste Message Queue
The Message Queue from the copy icon ![]() , or the message queue URL can be copied from any other source and this will activate the paste icon
, or the message queue URL can be copied from any other source and this will activate the paste icon ![]() on all of the topics and triggers.
on all of the topics and triggers.
Delete a Message Queue
Administrative users are able to delete a message queue by using the Trash Bin icon. This will stop notifications from being generated and sent to the nominated message queue.