Introduction
Users with Service Provider Scope and Admin Grant are able to create, edit and view Fleets and Accounts.
Create New Account
To create a new Account, users will need to click on the ![]() . A multi-step form will be visible. Mandatory fields are marked with
. A multi-step form will be visible. Mandatory fields are marked with ![]() .
.
| Step | Description |
|---|---|
| Details | 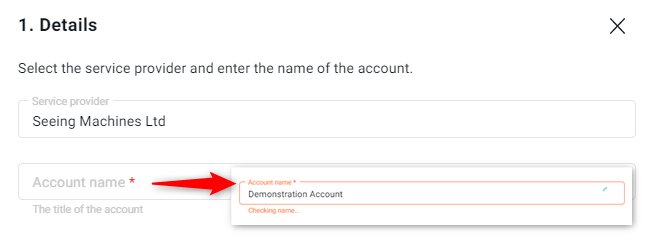
Guardian Live will check the name to ensure that there is no conflict with an existing Fleet. |
| Address and Localisation | 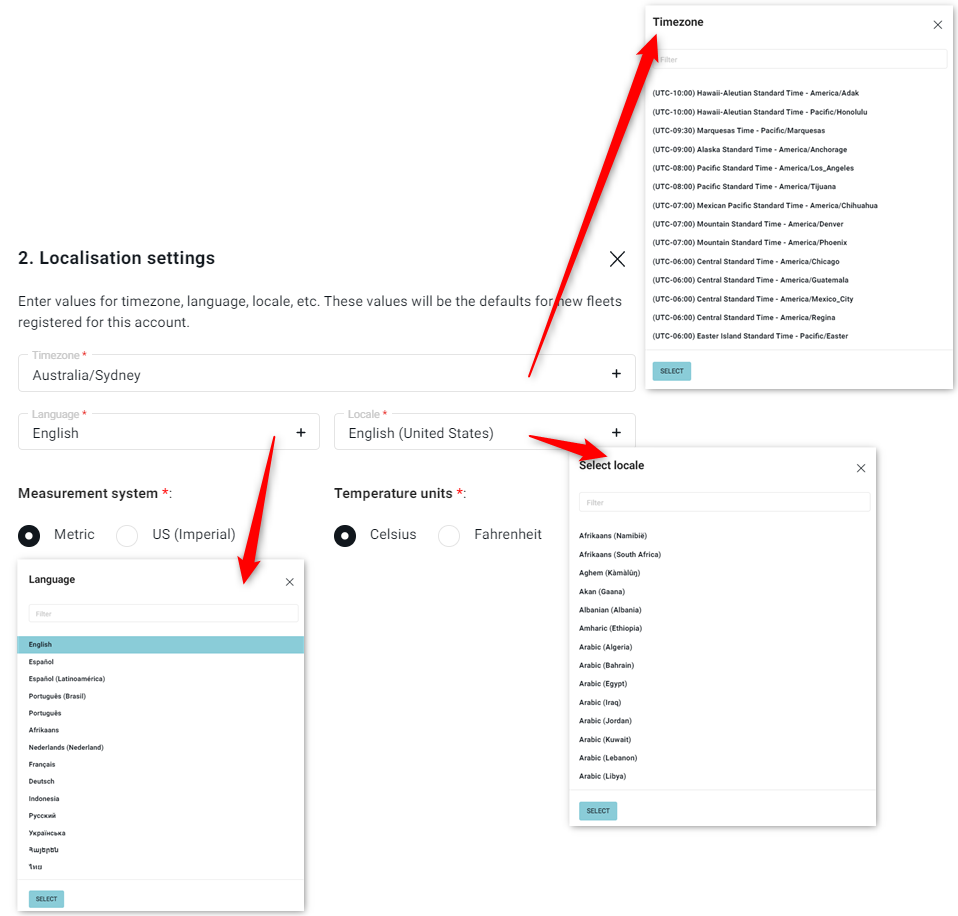
Note – Guardian Live only supports a limited selection of languages. |
Users will need to ![]() to save the settings. Confirmation will be provided when this has been done
to save the settings. Confirmation will be provided when this has been done ![]()
The new Account is now visible in the Account view.
Edit Account
Clicking on the name of the Account or the ellipses ![]() at the top-right of the tile will display the Account details.
at the top-right of the tile will display the Account details.
Any information presented in bold can be edited. ![]() should be used to save the changes.
should be used to save the changes.
| Step | Description |
|---|---|
| Details | 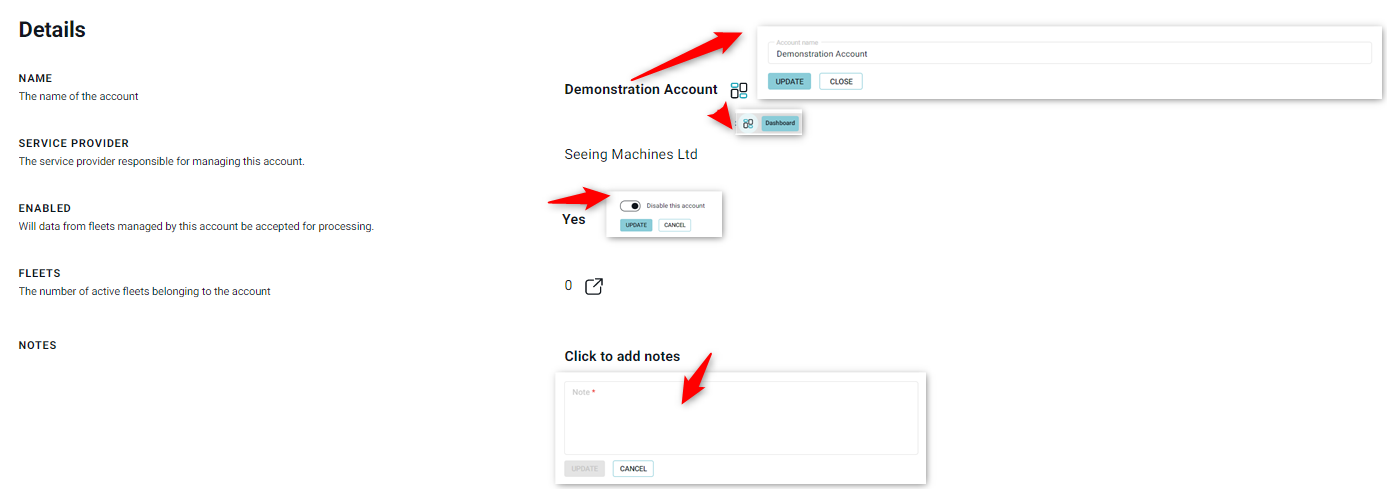
Note – notes entered here are only visible when viewing the Fleet details. Note – Disabling an Account will disable all Fleets and vehicles that belong to the Account. Vehicle events will not be monitored and Intervention Plans will not be actioned. Note – Clicking on the |
| Region and Locale | 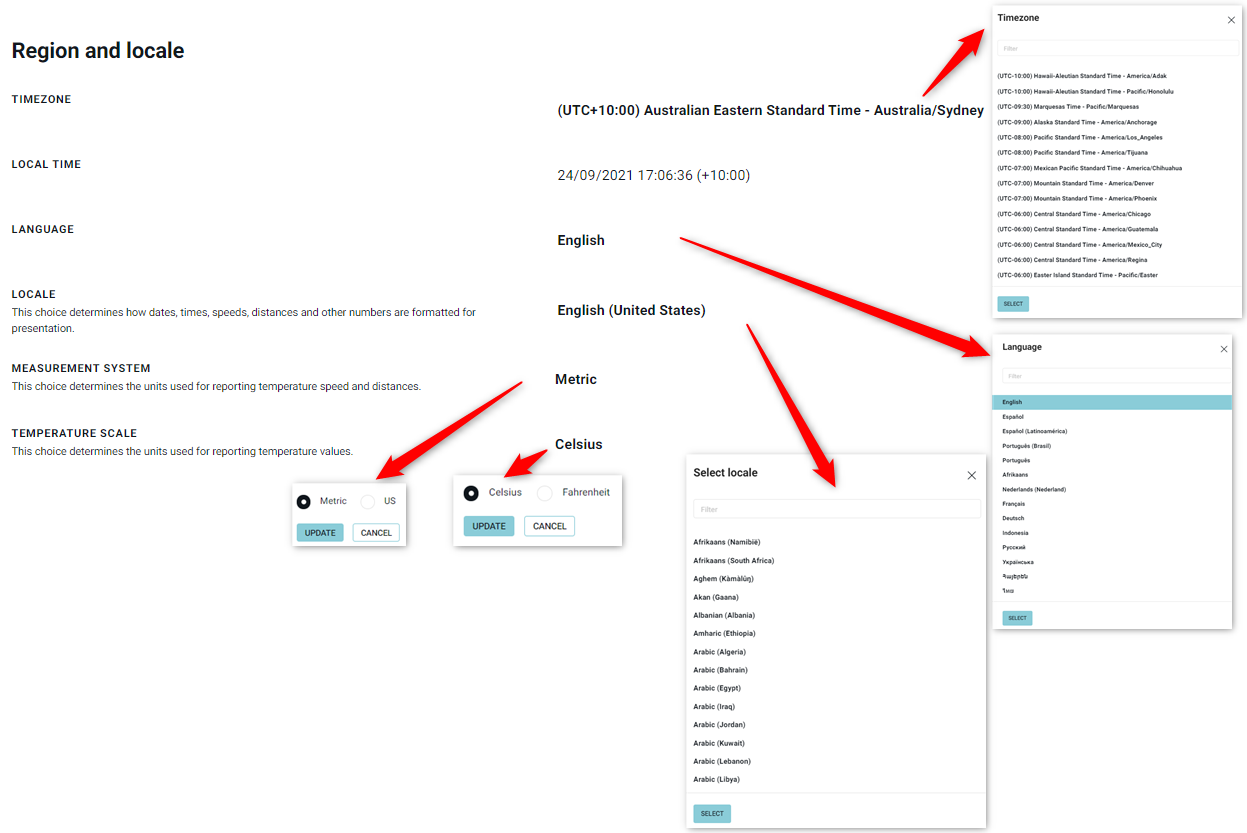 |
| System – provides information about when the Service Provider record was created and last modified. | 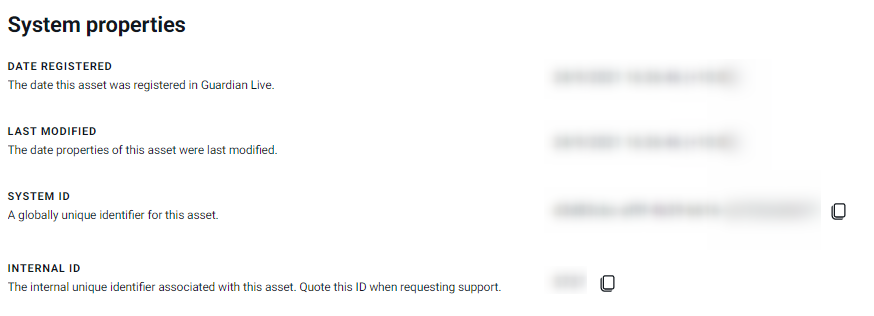 |
Disable Account
Any level admin can disable the account that they have access to. It is important to note that when you disable a fleet or an account or a service provider, it stops any processing of data from that fleet or account, or service provider immediately. So, we have added some extra steps to make sure that they aren’t disabled accidentally.
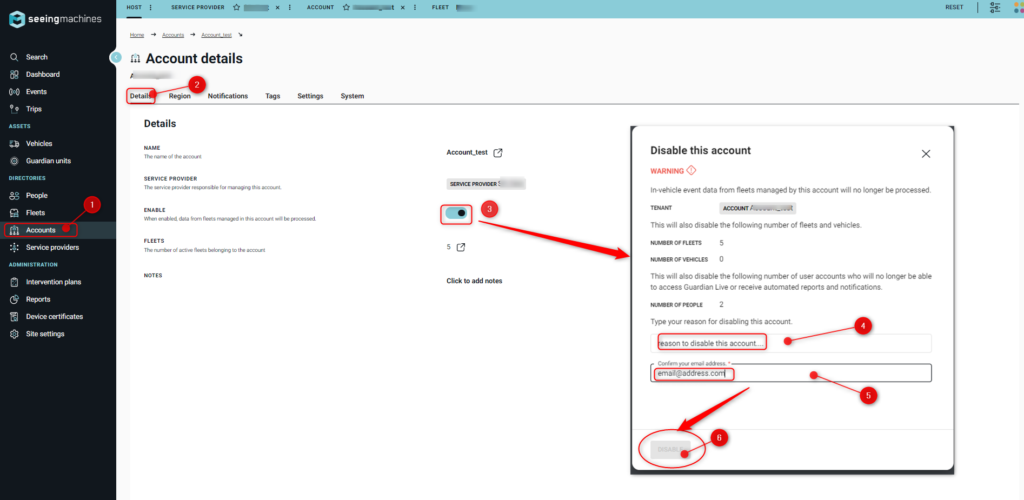 (1) In order to disable an account, you need to first go to the Account Detail page and find an enable-disable toggle.
On clicking the toggle to disable an account, a module comes up with a warning that disabling an account immediately stops the processing of in-vehicle event data from that fleet. The module also gives an overview of the number of vehicles and the number of fleets to show how much data is coming through and also the number of people that it might affect.
(4) The user is required to enter the reason for disabling the account.
(5) The user is also required to enter the email address, with which they signed in to Guardian Live.
(6) Then finally after entering the reason and email address the Disable button is activated. On clicking Disable, the account will be disabled.
After disabling the account, there’ll be no data being processed.
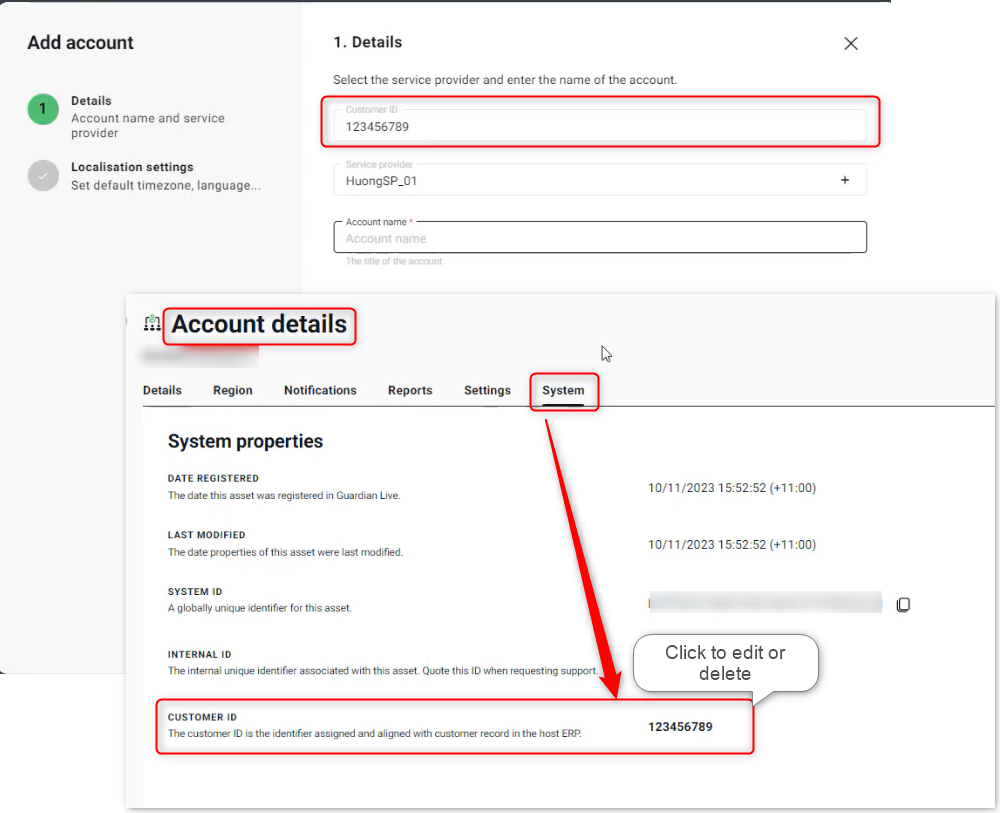
Add Customer ID to Account
Host admin users have the flexibility to input a customer ID while creating a new account, although it is not a mandatory requirement. This data can be updated at a later time within the account details found in the settings tab. Host scope administrators are empowered to either delete or edit this customer ID from the settings tab. Additionally, this functionality allows for searching by customer ID of that account using the global search bar within the Guardian Live web application.