Reports
Users with Elevated Grant are permitted to view Reports. Users with Administrator Grants are permitted to create or edit Reports.
This article will explain how Admin users can create, edit and disable Reports.
Create Activity, Diagnostic, or Weekly Reports
You can easily create new reports or make changes to existing reports using the Account Details or Fleet Details page. The following guidelines will help you navigate this process effectively:
-
Creating Fleet Reports:
-
If you’re creating a report for one or more fleets under an Account, these reports will be categorized as fleet reports.
-
-
Staging Fleets:
-
Please note that reports cannot be created for staging fleets. This restriction applies specifically to fleets in the staging phase.
-
Follow the following instructions to create or modify reports according to your requirements.
Steps:
-
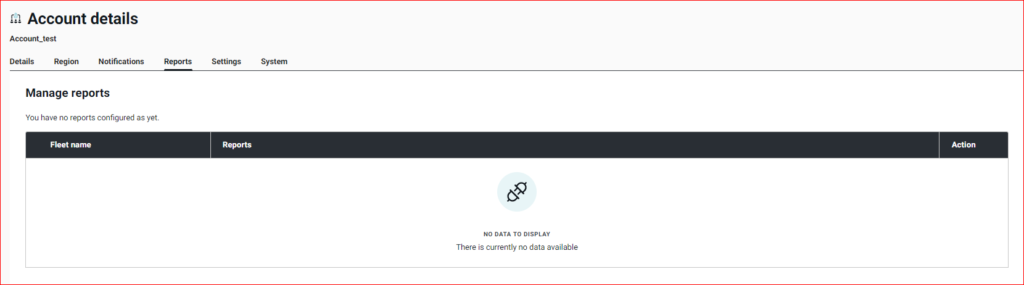
In order to navigate to the reports creation section from the Account details page first go to the Account tab.
-
Click on the Account name you want to add the reports to.
-
If there are no fleets under the account, the add reports button is hidden. And it says,” You have no reports configured as yet.”
-
For the accounts that have fleets under them, there is a Create new reports (+) button at the top of the page.
-
In order to add a new report,
-
Click on the
 button. This opens up a stepper that can be followed to create the Activity or diagnostic reports, configure it, schedule it, and add in the subscribers.
 -
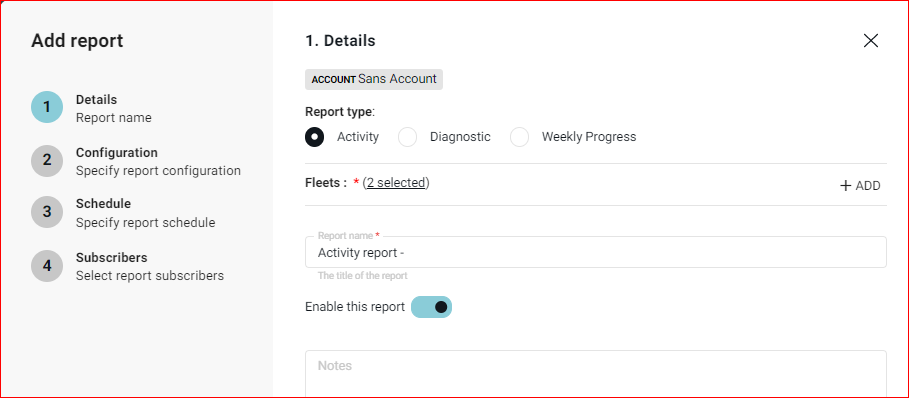
Details Page
-
Reports Type: Select the report type: Activity report or Diagnostic Reports or Weekly Reports.
-
Fleets: Add one or more fleets. Adding the fleet is Mandatory and adding the fleet will enable the next button.
-
Report Name:
-
If only 1 fleet is selected, the name will be populated automatically to “ Report Type- Fleet Name”, and it can be edited and changed.
-
If multiple fleets are selected, the name will only have the report type, and the name can be edited and changed.
-
-
Enable: This is a toggle button that enables the report.
-
Notes: This is a space where you can add any notes related to the report. The text limitation is 512 characters.
-
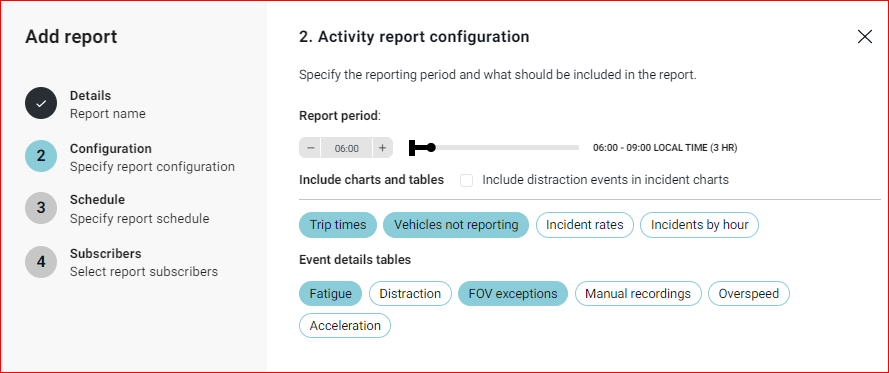
Activity Report Configuration: On clicking the Next button, the stepper will take the user to the Configuration settings for the type of report that is being created. If the user selected Activity reports the following configuration is shown.
-
Report Period: The bar can be dragged to specify the reporting time from 1 hour to 24 hour.
-
Include Charts and Tables:
-
In order to include the distraction events in the incident charts, check the checkbox.
-
One or multiple charts and tables can be selected from the given options simply by clicking on them. The chart types that will be included in the reports are highlighted in blue.
-
-
Event Details Tables: One or multiple event types can be selected in order to include them in the events tables. The event types that will be included in the report are highlighted in blue.
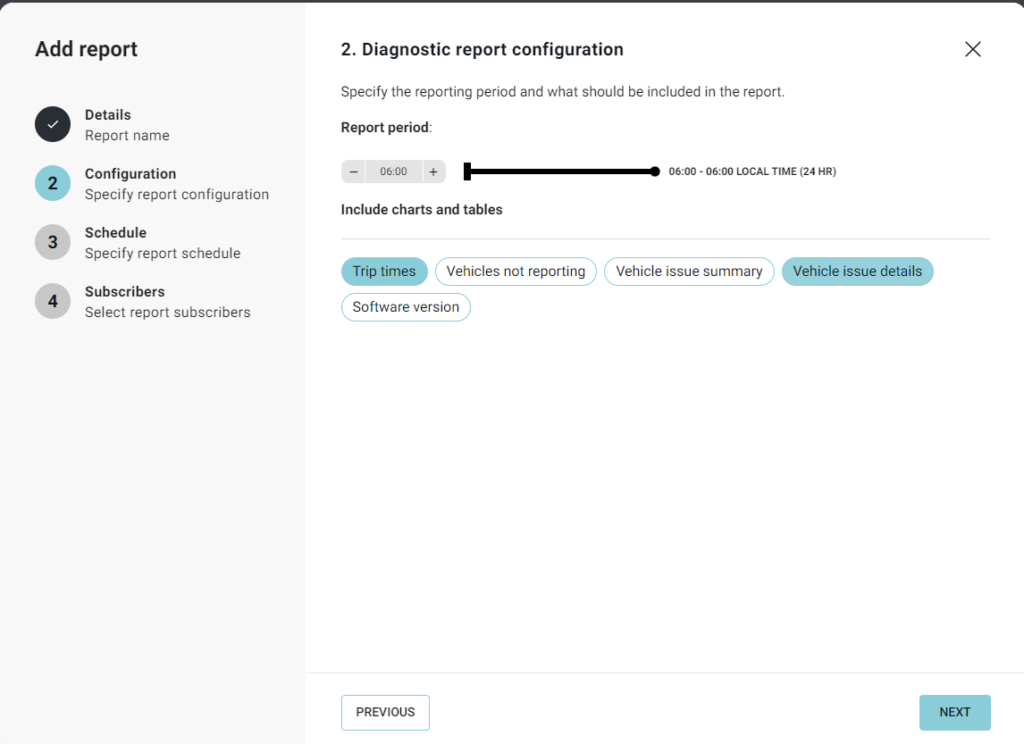
- Diagnostic Reports Configuration: On clicking the Next button, the stepper will take the user to the Configuration settings for the type of report that is being created. If the user selected Diagnostic Reports the following configuration is shown.
i. Report Period: The bar can be dragged to specify the reporting time from 1 hour to 24 hours.
ii. Include Charts and Tables: One or multiple charts and tables can be selected from the given options simply by clicking on them. The chart types that will be included in the reports are highlighted in blue.
-
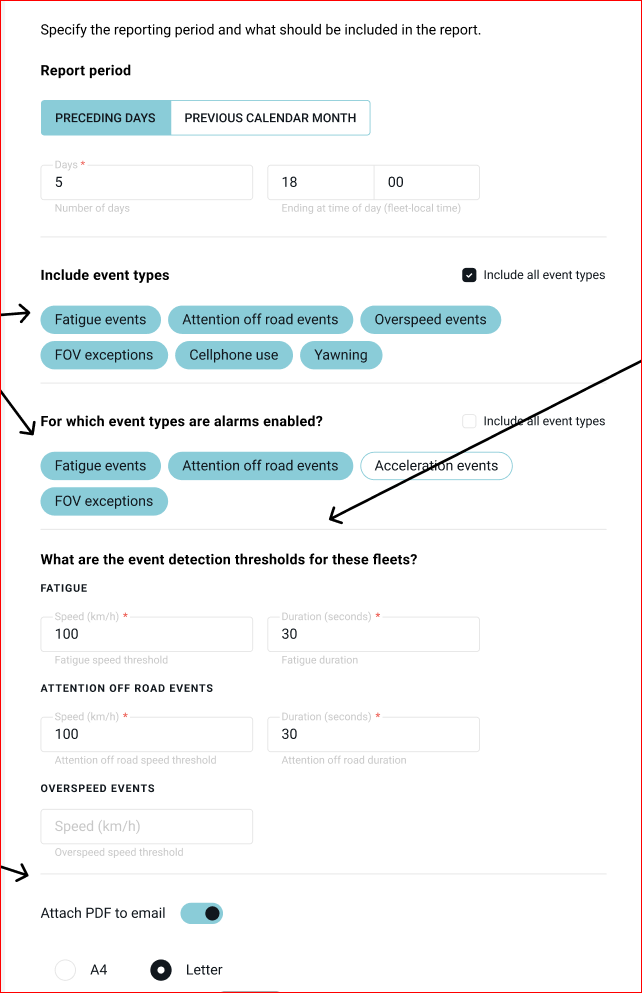
Weekly Progress Reports Configuration: On clicking the Next button, the stepper will take the user to the Configuration settings for the type of report that is being created. If the user selected Weekly Progress Report the following Configuration is shown.
-
Report Period: The user can specify the preceding number of days or the previous calendar month as desired for the given options.
-
Include Event Types:
a. Include all event types: The user can check the checkbox to select all the event types for the report.
b. Alternatively, the user can click on the pills to select desired event types which will be included in the report. -
Alarms Enabled?- The user can specify the type of events that the alarm is enabled for in this section.
a. Include all event types: The user can check the checkbox to select all the event types for the report.
b. Alternatively, the user can click on the pills to select desired event types which will be included in the report. -
Event detection threshold: For different types of events the user can specify the threshold for speed and duration of the event that will trigger the alarms when the event duration and speed exceeds these thresholds.
-
Attach PDF to email: On turning on this toggle, the PDF file for this report is attached to the email. The user can also select if they want the pdf in an A4 size or letter size.
-
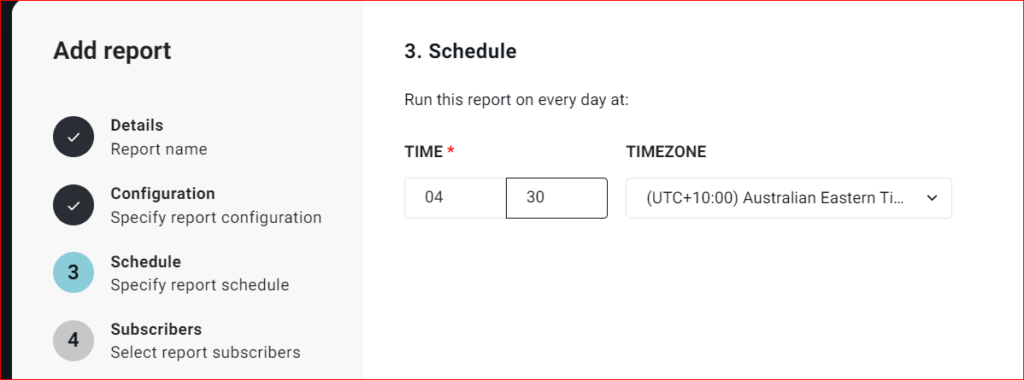
Schedule: The user can specify when the report will run. For activity and diagnostic reports, the reports will run daily. So the user can enter the time of the day they want the report to run at. The timezone will be defaulted to the user’s location which can also be changed manually.
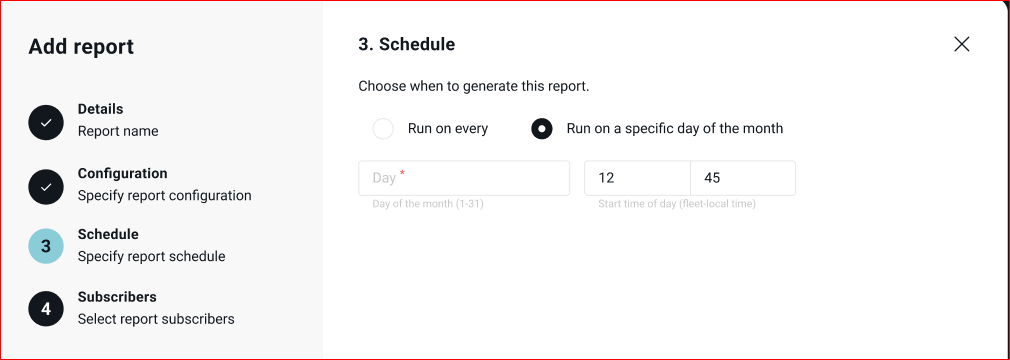
Schedule for Weekly Reports: The “Run on every” radio button will be selected by default where the user can enter the interval of days along with the time period being populated to “Now” by default, which can be overwritten by the user.
Alternatively, the user can specify the report to “Run on a specific day of the month”, where the user can enter any specific day from 1-31 and the user can also specify the start time for the report to run.

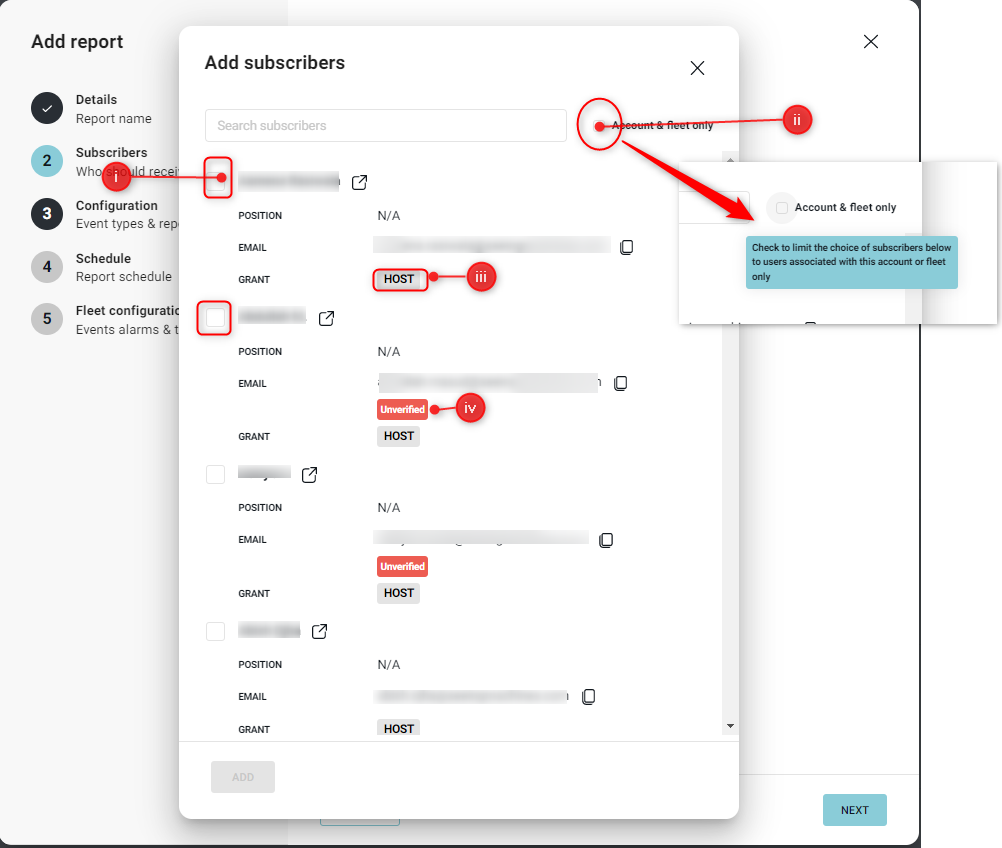
7. Subscribers: The user can choose subscribers for an account. If the reports is created for a single fleet at a time, the fleet subscribers can be set up.
-
Simply check the subscribers that you need to add to the reports.
-
On checking the Account and Fleet only, will filter and display all the users with access to this particular account/fleet that the user is operating from. All users displayed who have account/fleet access.
-
The grant of the users will be displayed in the subscriber list.
-
The list of subscribers will also include unverified users who can be added to the subscribers. It will also contain disabled accounts, but the disabled accounts cannot be added as subscribers and will have a grey highlight over it.
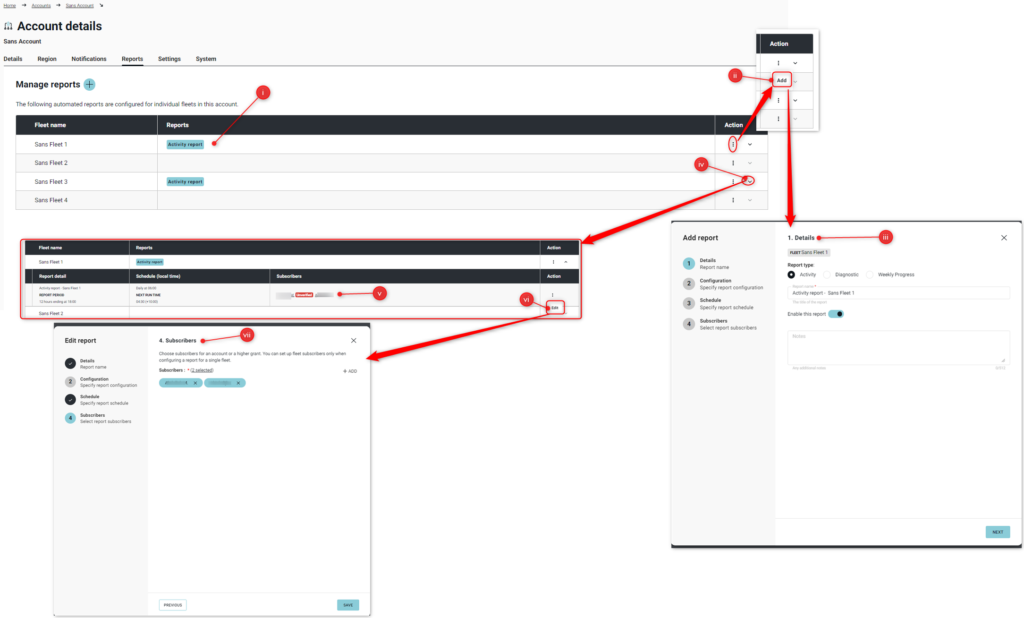
Once the Reports have been created for the account and fleets, it is displayed in the accounts details and reports tab.
i) The report that was created under every fleet in the account is displayed.
ii) If the user wants to add a new report to this fleet, it can directly be done from the table. The menu has an option to “Add” more reports under the fleet.
iii) On clicking the add button, the stepper to add new reports will be open with the fleet pre-selected. Any reports added from this stepper will be added to this single fleet. The report name will be defaulted as an account name- a fleet name that can be changed by the user. The user can simply follow this stepper to add a new report to this fleet.
iv) More details can be opened and viewed by clicking on the dropdown option in the actions column.
v) The dropdown when opened has details of the Report name, the Report Period when the report is scheduled to run, when is the next run time, and who is subscribed to this report. The status of unverified users is also displayed in the list.
vi) All of the details mentioned in (v) can be changed. In order to update or modify any of the information the user can simply click on the Edit option from the menu in this row.
vii) This will open up the Edit Report flow, which will have all the information and values previously entered prefilled. The user is able to modify all the details of this flow. The edit option first opens the details page of the Edit Report flow. But the user can jump to any relevant flow that they want to modify. In the image, the user has directly jumped to the Subscribers step by clicking on the subscribers on the left. The user can navigate through the stepper by clicking on the next button as well, which will take them through all the steps and allow them to modify any value.
Similarly, the same reports can be created from the Fleet details page (go to Fleets page-> open a fleet → go to Reports-> click on the
) with the same flow the only difference being the report will be created for the specific selected fleet. -
-
-
-
-
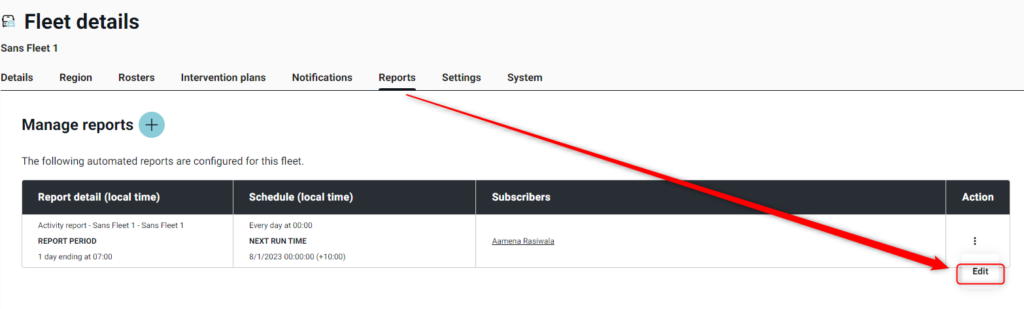
Edit a Report
Administrative users are able to edit reports. The report configuration, fleet configuration, and subscribers can be edited. In order to edit a report, the user can search it from the report list and click on the edit option from the contextual menu.

Alternatively, the user can also navigate to edit reports via the account/fleet reports page.
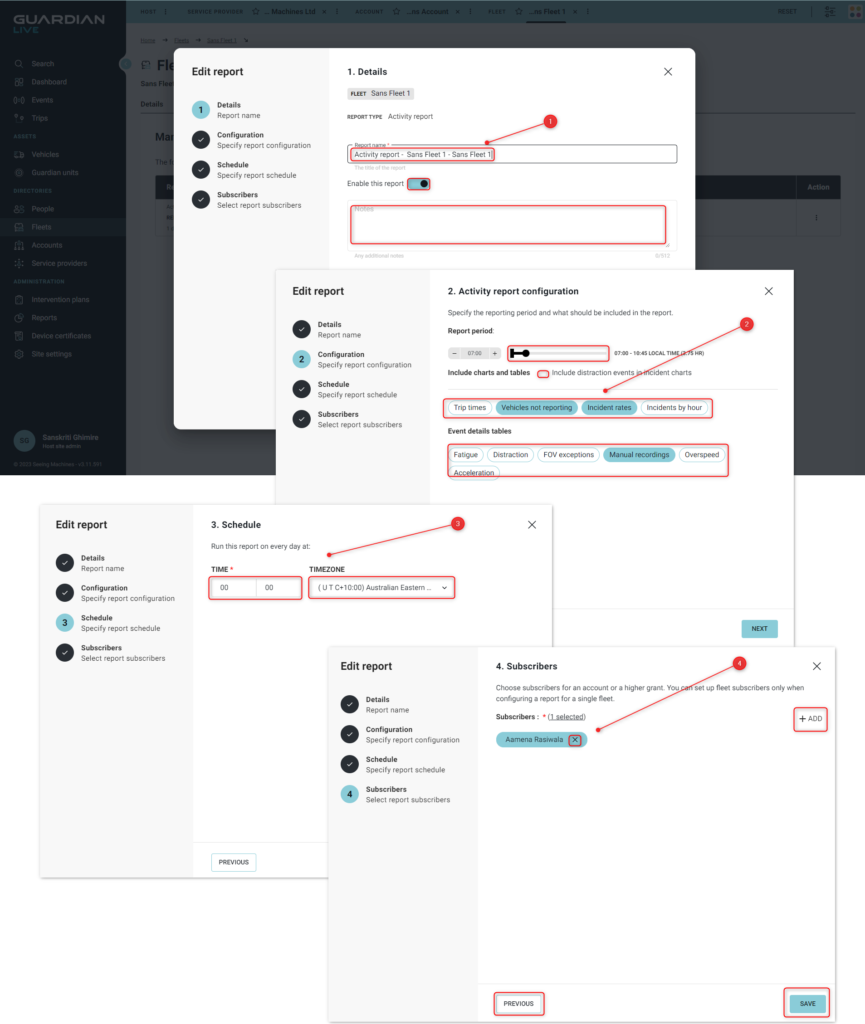
Edit Report Steps
The user can change any details of the report that they created or have access to.
- The user can change the name of the report, enable or disable the report and also add notes.
- The user can change all or any configuration that is available for the type of report they selected.
- The user can edit the time the report was scheduled and also the timezone.
- The user can add new subscribers to the report or remove previous subscribers.
Disable a Report
Administrative users are able to disable a report. This will stop the report from being generated and sent to the nominated subscribers. The report will also not be visible in the Report view unless the user specifically searches for disabled reports.
The users can Disable the report using the shortcut presented when the ellipses ![]() are clicked on the reports list page besides the report you want to disable.
are clicked on the reports list page besides the report you want to disable.
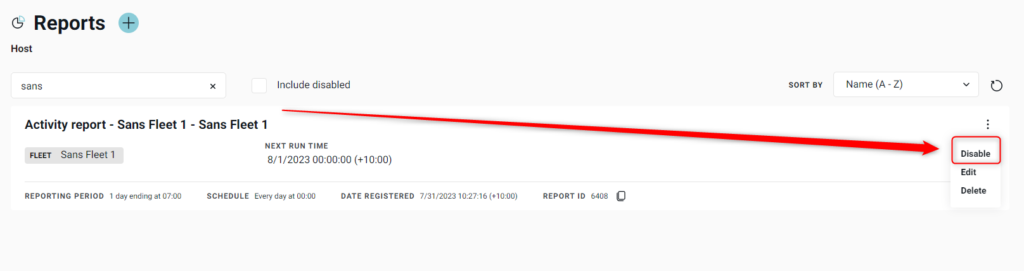
When this action is complete, the report will be marked as ‘disabled’.

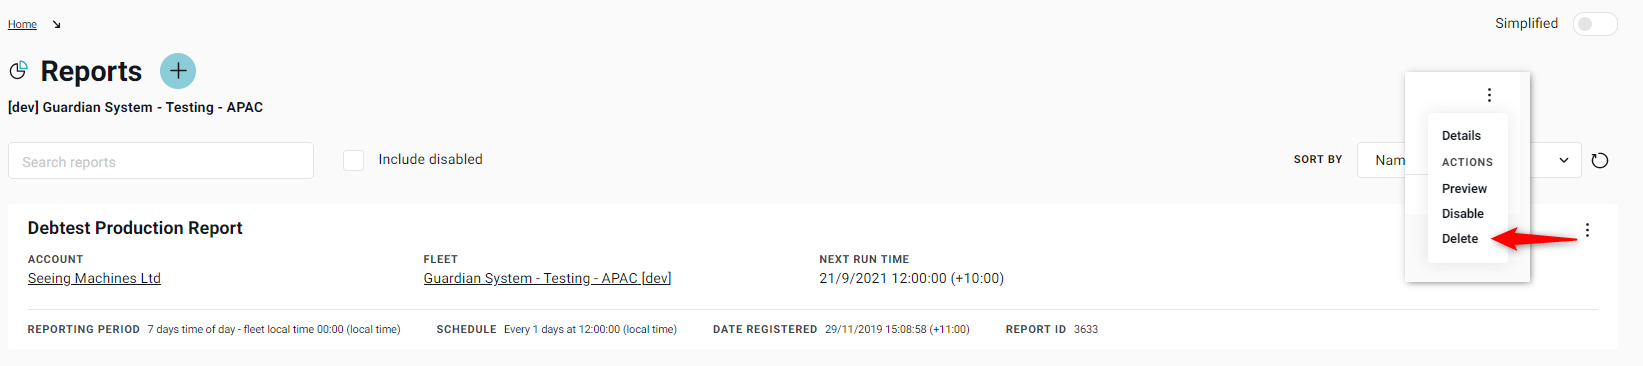
Delete a Report
Administrative users are able to delete a report. This will stop the report from being generated and sent to the nominated subscribers and it will no longer be visible in Guardian Live.
Users will need to open the ellipses at the top-right of the tile.