Event Tags
We believe that the Event Tags feature will significantly enhance the event management experience for our Guardian Live web application users. By providing a simple yet powerful way to create tags and tag events, users can effortlessly organize and filter events according to their business requirements, resulting in improved productivity and a more tailored experience.
By utilizing tags, users can easily categorize and filter events based on their business needs, resulting in improved organization and efficiency.
Key Benefits:
-
Create Custom Tags: Depending on the access rights the admin users can define their own tags, allowing them to align event categorization with their specific business requirements.
-
Tagging Events: Users can assign tags to events, making it simple to classify and label events with relevant information.
-
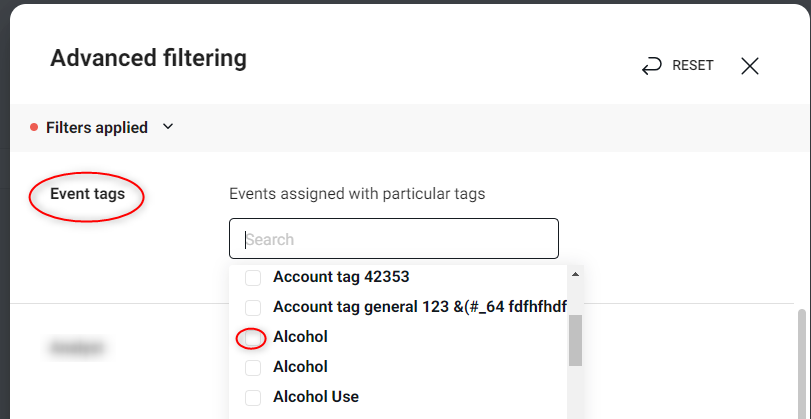
Efficient Filtering: With the Event Tags feature, users can easily filter events based on their assigned tags. This enables quick access to specific events that are relevant to their business needs.
All users are able to assign tag(s) to events.
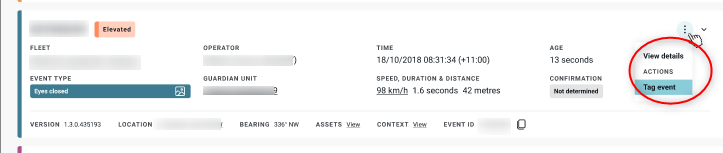
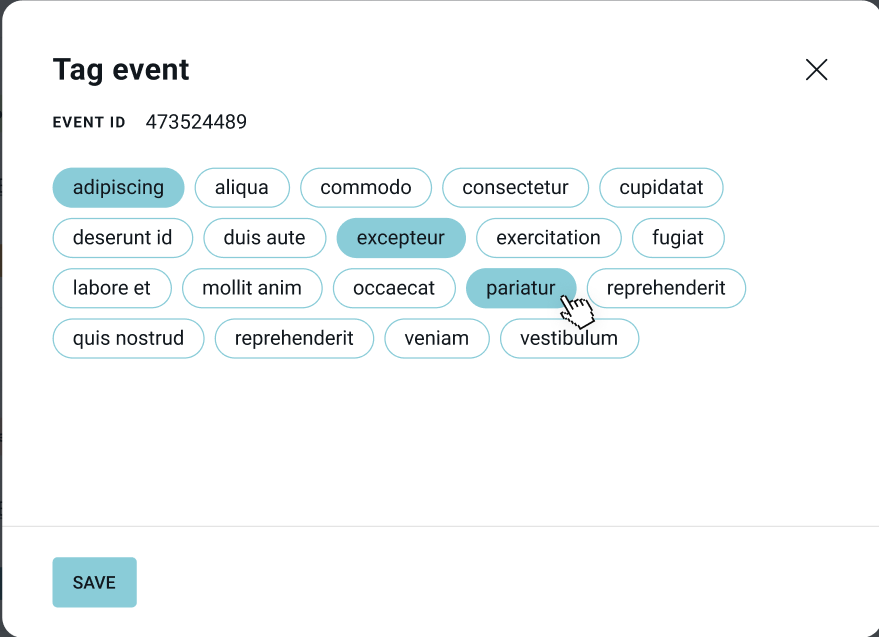
In the Events page, go to the event you want to TAG.
-
Click on the menu and select the option “Tag Event”.
-
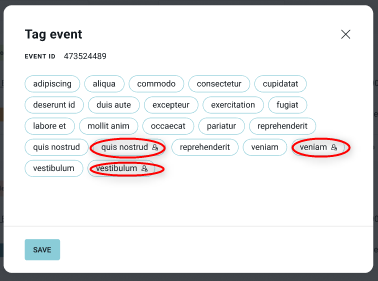
The global tags, restricted tags(if a user is logged in as host site admin), fleet and account level tags of the account and fleet the vehicle is under are displayed and the users can simply click on these tags to tag the event. The highlighted tags will be tagged to the event after clicking on the Save button.
-
For host scope users, restricted tags(with the lock icon) are only visible to host scope users.
-
For other users, the restricted tags are not visible. the tags are sorted in alphabetical order.
-
Hovering over the tags displays a description and information on which tag category it belongs to amongst global, account, or fleet.
-
- The user is able to select one or multiple tags for an event. The selected tags when saved will be assigned to the event.
In order to edit the event tags, follow the following steps:
-
Go to the event list and select the event for which you want to edit the tags. On the menu dropdown option click on Tag event.
-
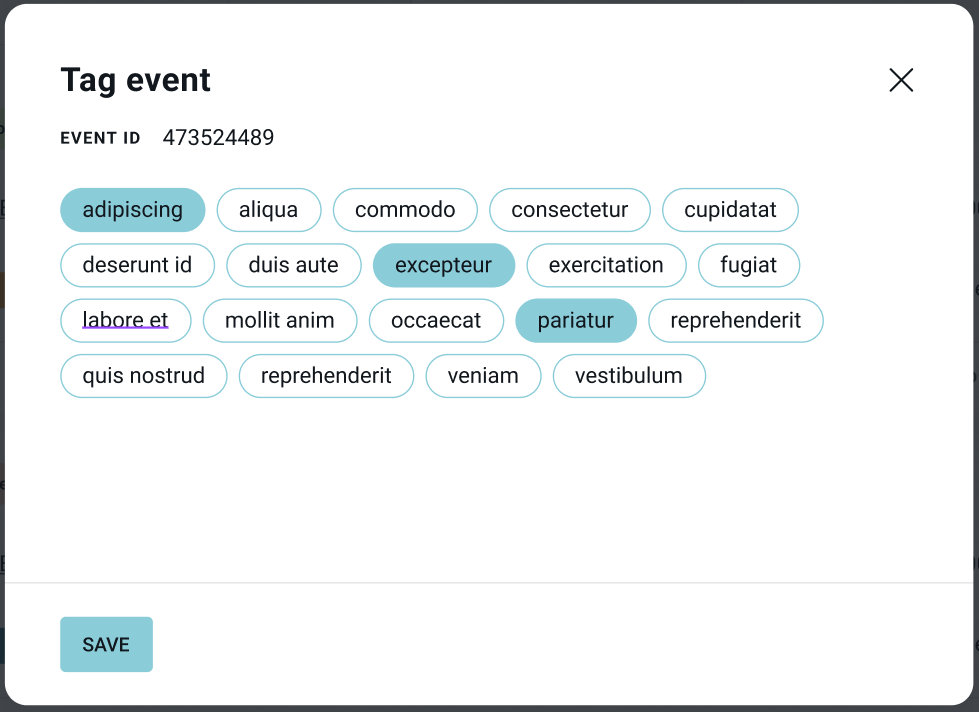
This will open “Tag Event” module where you can click and add more tags or click on the pre-selected tags to remove the selection and save it to update the edits.
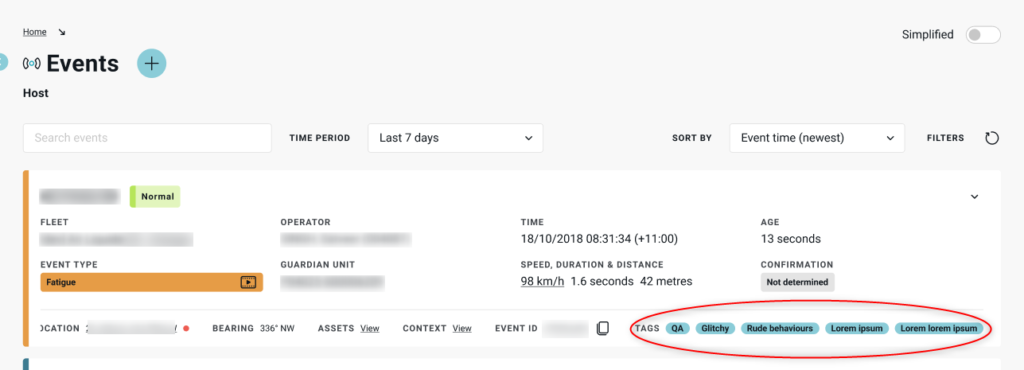
The tags that are created under an event are shown in the tags section for that event on event list page.
-
The user can then use the filter icon to open the advanced filtering where the users can filter events by the event tags.