Introduction
Users with Account Scope and Admin Grant are able to create, edit and view Fleets.
Create New Fleet
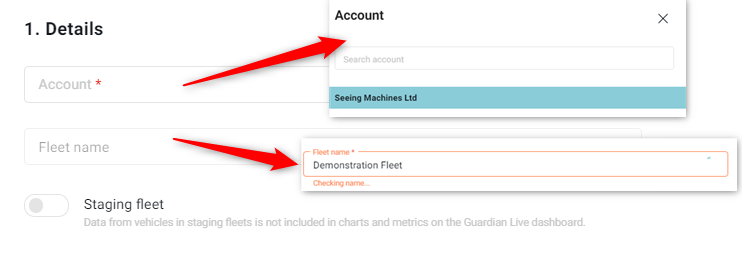
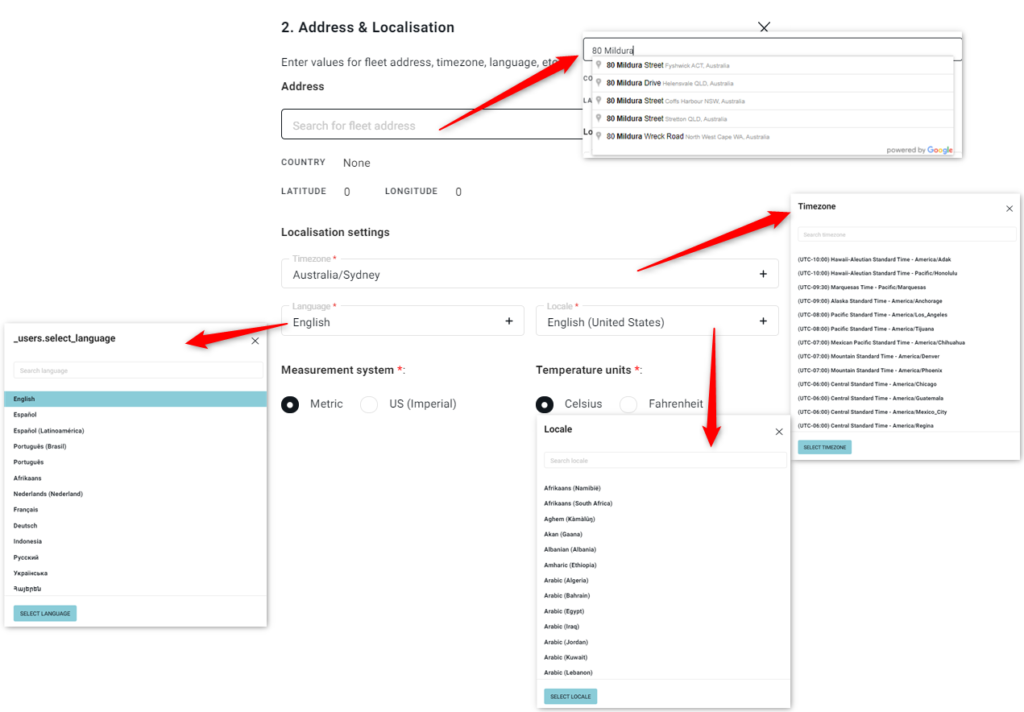
To create a new Fleet, users will need to click on the ![]() . A multi-step form will be visible. Mandatory fields are marked with
. A multi-step form will be visible. Mandatory fields are marked with ![]() .
.
Users will need to ![]() to save the settings. Confirmation will be provided when this has been done
to save the settings. Confirmation will be provided when this has been done ![]()
The new Fleet is now visible in the Fleet view.
Edit Fleet
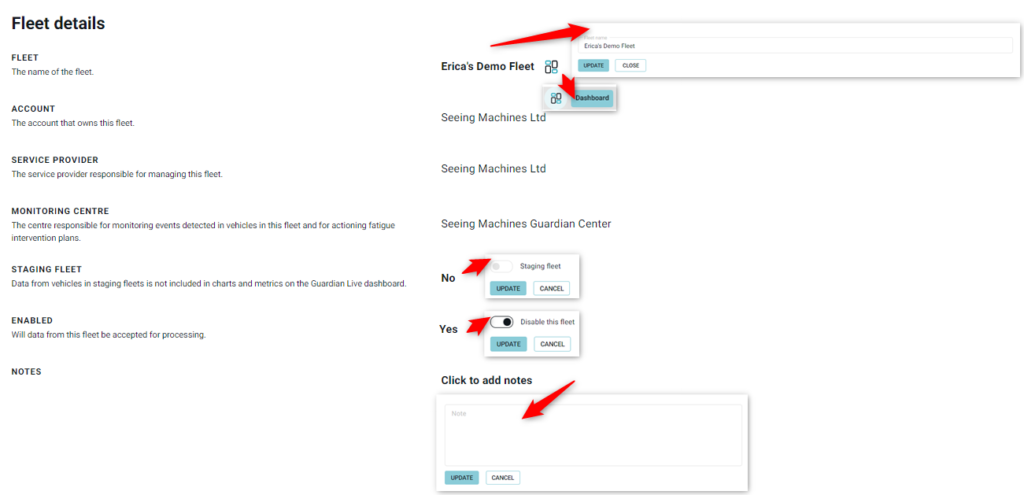
Clicking on the name of the Account or the ellipses ![]() at the top-right of the tile will display the Fleet details.
at the top-right of the tile will display the Fleet details.
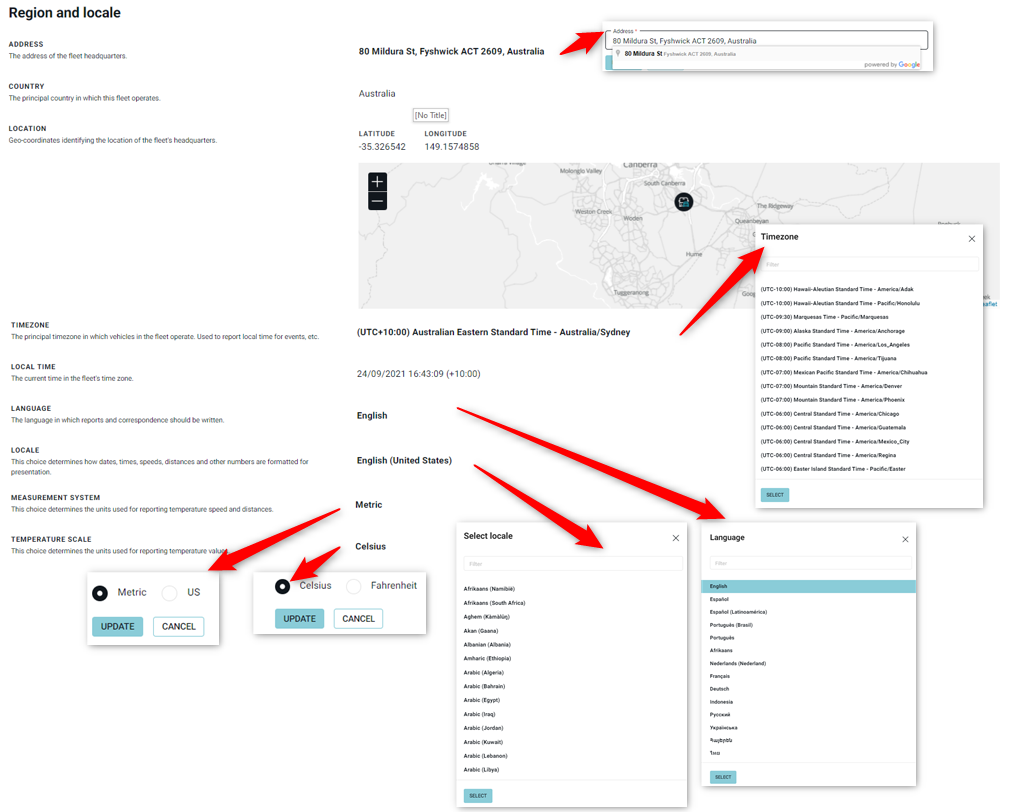
Any information presented in bold can be edited. ![]() should be used to save the changes.
should be used to save the changes.
Disable Fleet
Any level admin can disable the fleet that they have access to. It is important to note that when you disable a fleet or an account or a service provider, it stops any processing of data from that fleet or account, or service provider immediately. So, we have added some extra steps to make sure that they aren’t disabled accidentally.
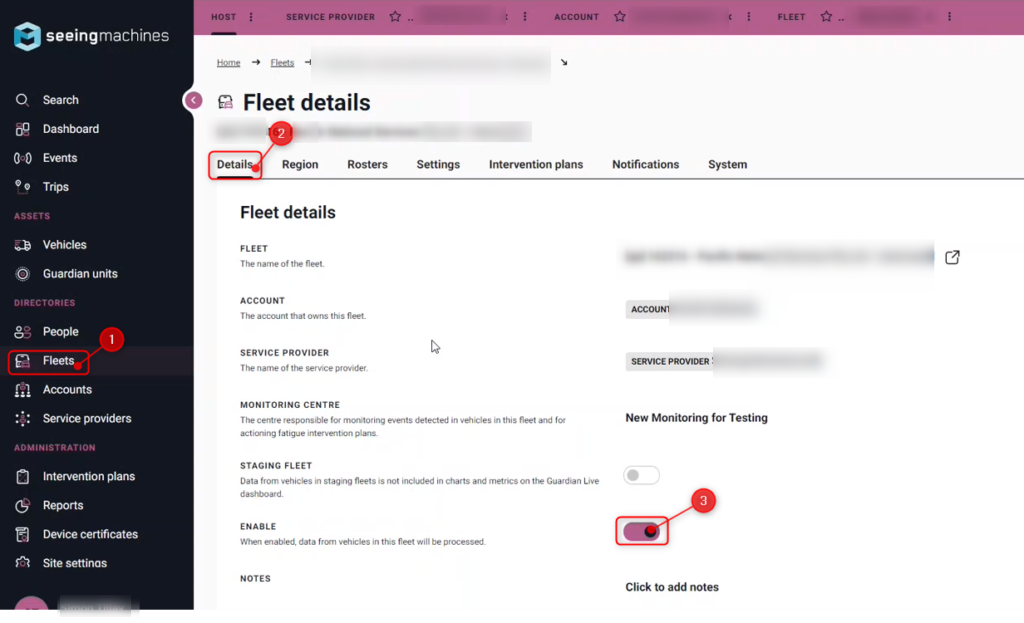
In order to disable a fleet, you need to first go to the Fleet Detail page, and find a enable-disable toggle.
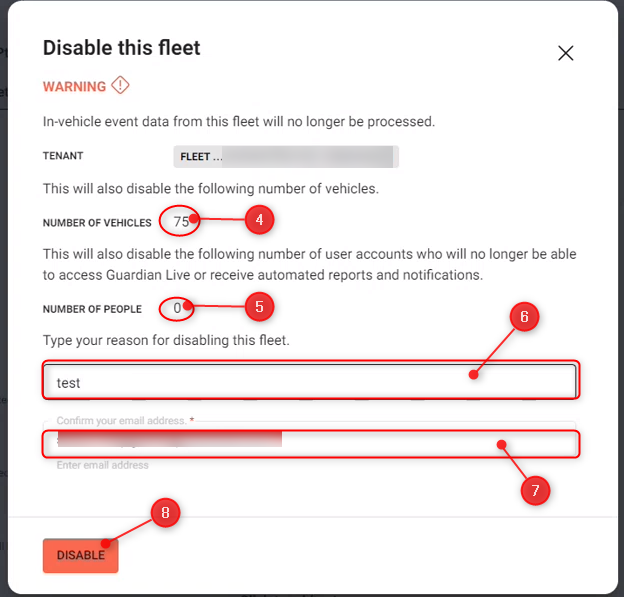
On clicking the toggle to disable a fleet, a module comes up with a warning that disabling a fleet immediately stops the processing of in-vehicle event data from that fleet. (4)The module also gives an overview of the number of vehicles to show how much data is coming through and also the number of people that it might affect. (5)
(6) The user is required to enter the reason for disabling the fleet.
(7) The user is also required to enter their email address.
(8) Then finally after entering the reason and email address the Disable button is activated. On clicking Disable, the fleet will be disabled.
After disabling the fleet, there’ll be no data being processed. It’ll just be left in S3 without being processed for this fleet.

